Quantcast
Channel: How To
Viewing all 452 articles
Browse latest View live

How to Setup Single Node OpenShift Cluster on RHEL 8

$
0
0

Using RedHat CodeReady Containers (CRC), we can easily install latest version of OpenShift cluster on laptop, desktop or in a virtual machine. In this tutorial, we will demonstrate how to setup single node openshift cluster on RHEL 8 system with crc. This type of openshift cluster is used only for testing and development purpose, it is not recommended for the production use.

Minimum System Requirement for OpenShift based on CRC
  • Freshly Installed RHEL 8
  • KVM hypervisor
  • 4 CPUs (or vCPUs)
  • 8 GB RAM
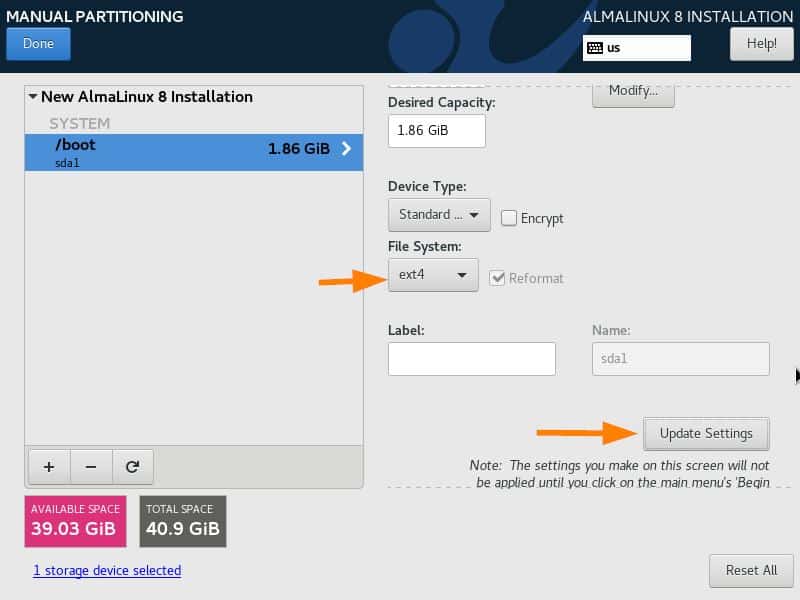
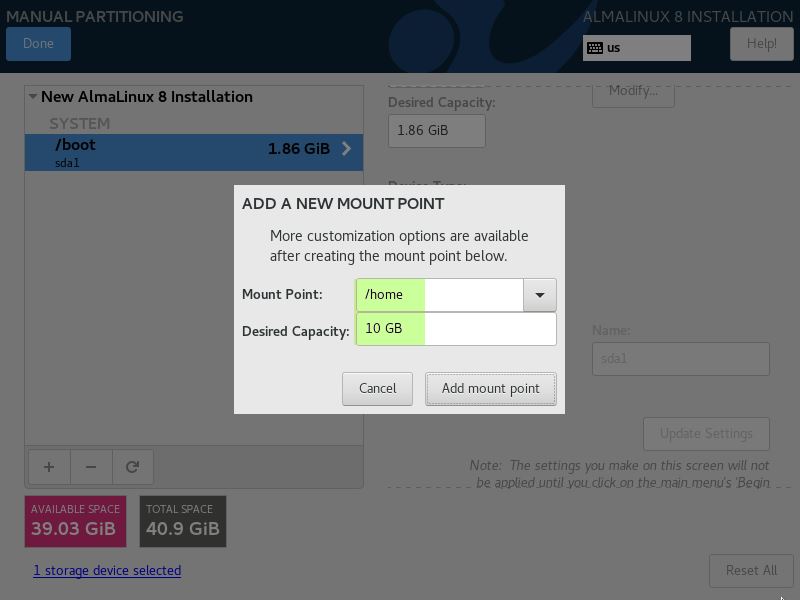
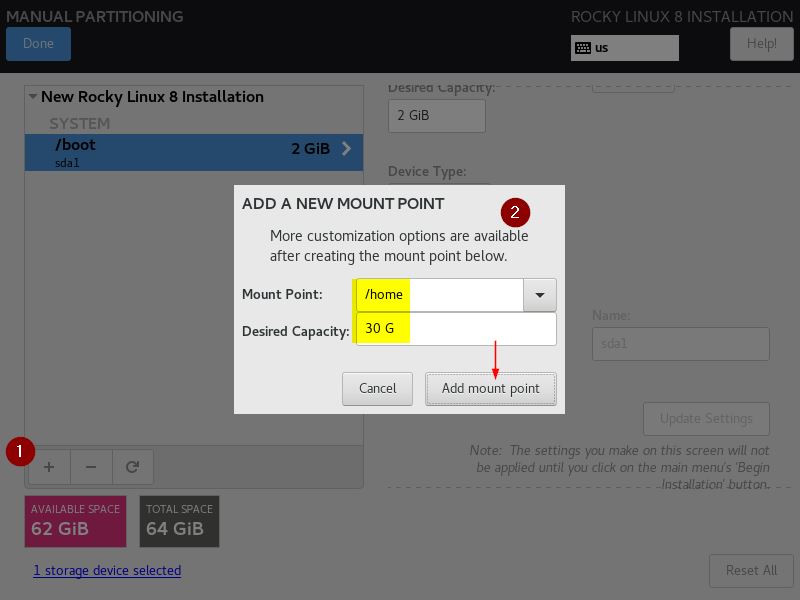
  • 40 GB Free space on /home

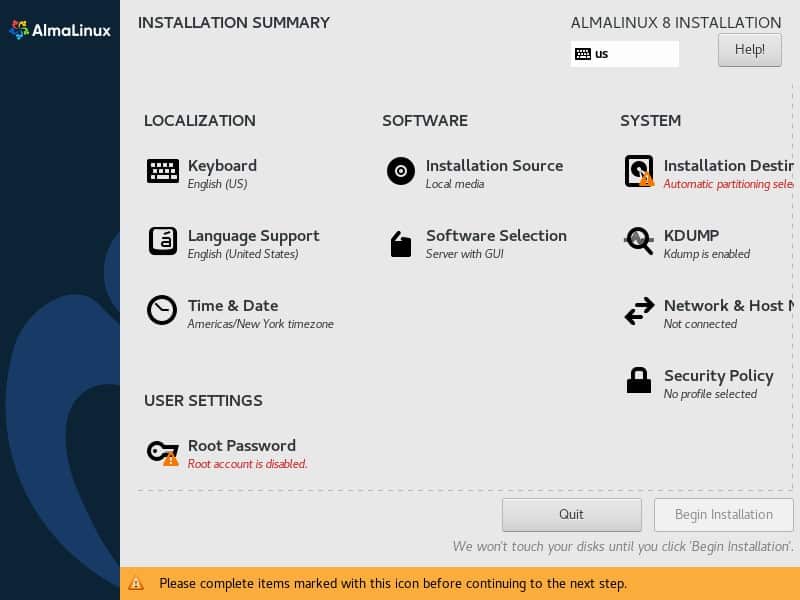
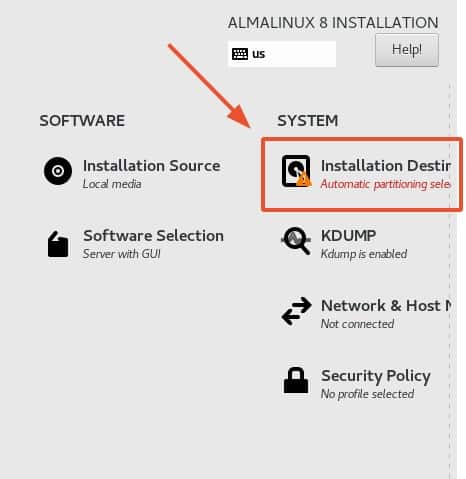
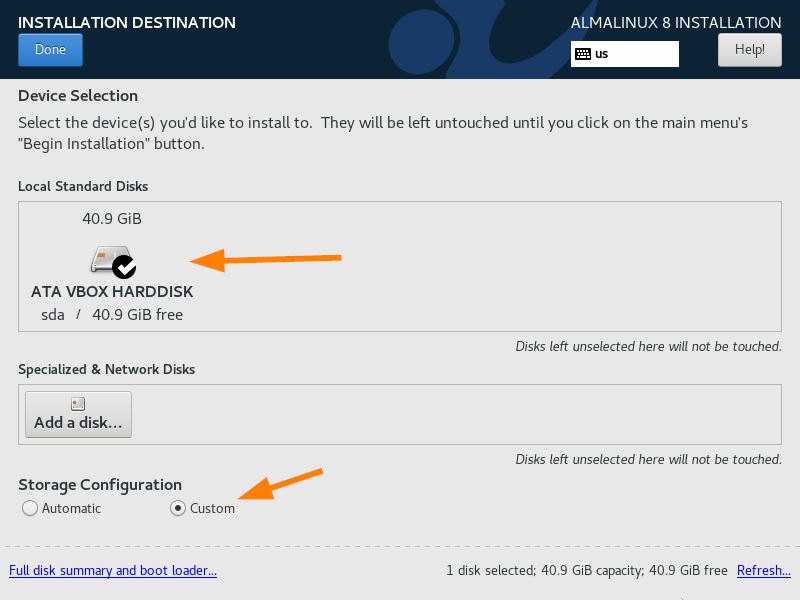
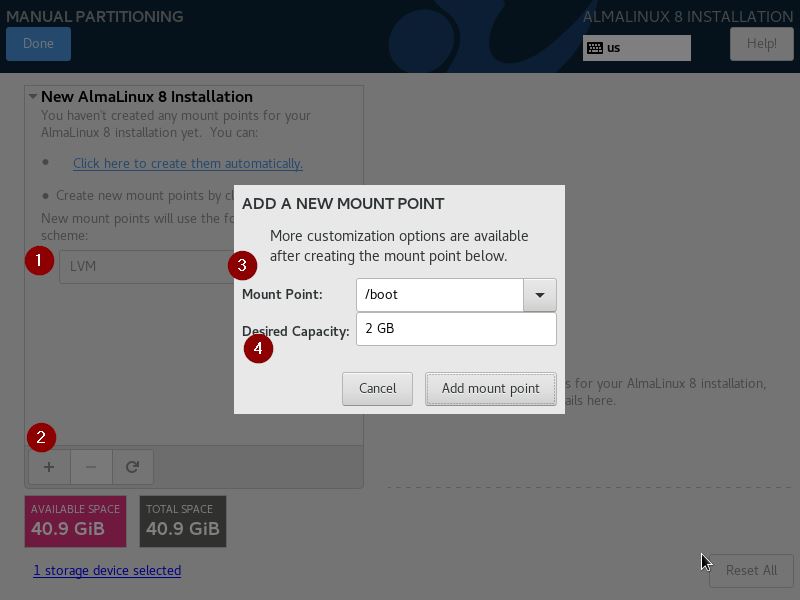
I am assuming above requirements are already fulfilled on your RHEL 8 system. In my case I have installed RHEL 8 with GUI and KVM hypervisor during the installation. In case you have minimal installation of RHEL 8 then first setup kvm on your system. Let’s jump into the installation steps,

Step1) Download Latest Version of CRC

Open the terminal and run the following wget command,

$ wget https://mirror.openshift.com/pub/openshift-v4/clients/crc/latest/crc-linux-amd64.tar.xz

Sample output of above command would be

download-lastest-crc-rhel8

Step 2) Extract Downloaded CRC archive & copy its binary

Once crc compressed archive file is downloaded, extract it using below tar command,

$ sudo tar -xpvf crc-linux-amd64.tar.xz

Copy the crc binary in /usr/local/bin directory

$ cd crc-linux-1.22.0-amd64/
$ sudo cp crc /usr/local/bin/

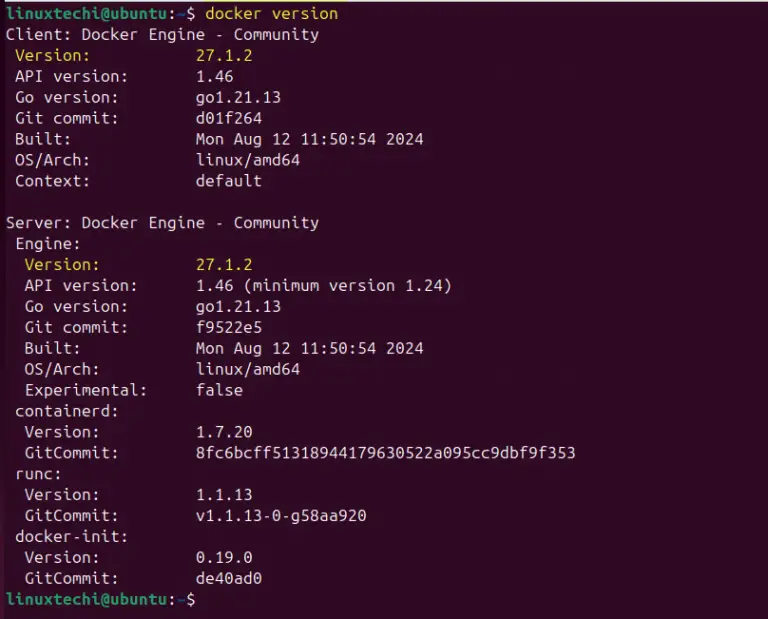
Now verify the crc version by running following command:

$ crc version
CodeReady Containers version: 1.22.0+6faff76f
OpenShift version: 4.6.15 (embedded in executable)
$

Step 3) Start OpenShift 4.x Deployment using CRC

Run ‘crc setup’ command to download crc virtual machine (crc.qcow2)  which is around 10.83 GB.

$ crc setup

crc-setup-rhel8

Once the ‘crc  setup’ is completed successfully then download the pull secret which will be used during the openshift cluster startup.

To download the pull secret login to below Redhat portal,

https://cloud.redhat.com/openshift/install/crc/installer-provisioned

Download-Pull-Secret-RedHat-Portal

Now finally run below command to start Openshift cluster,

Syntax:

$ crc start -p <path-of-pull-secret-file>

$ crc start -p pull-secret

Once above command is executed successfully, we will get the following output. In the output we have ‘kubeadmin’ credentials and cluster URL. Make a note of it we will use them later.

crc-start-kubeadmin-credentials-rhel8

To connect to OpenShift Cluster, set the following environment by executing:

$ crc oc-env
export PATH="/home/sysadmin/.crc/bin/oc:$PATH"
# Run this command to configure your shell:
# eval $(crc oc-env)
$

Copy above output and paste it in ‘.bashrc’ file at the end as shown below:

[sysadmin@openshift-rhel8 ~]$ vi .bashrc
…………………
export PATH="/home/sysadmin/.crc/bin/oc:$PATH"
# Run this command to configure your shell:
eval $(crc oc-env)
……………………

Save & close the file

Source the ‘.bashrc’ file to make above changes into the affect.

$ source .bashrc

Step 4) Connect and verify OpenShift Cluster

Before connecting to cluster, let first enable bash autocompletion feature. Run following commands,

$ oc completion bash > oc_bash_completion
$ sudo cp oc_bash_completion /etc/bash_completion.d/

Logout and login again.

Now, it’s time to connect to Openshift cluster, run below command, (This was there in crc start command output)

$ oc login -u kubeadmin -p APBEh-jjrVy-hLQZX-VI9Kg https://api.crc.testing:6443

Output of above command would be,

Login-OpenShift-Cluster-Kubeadmin-RHEL8

Above output confirms that ‘kubeadmin’ is able to login to the cluster successfully.

Run following oc command to verify the cluster details

$ oc get nodes
$ oc cluster-info
$ oc get clusteroperators

OpenShift-Cluster-Details-RHEL8

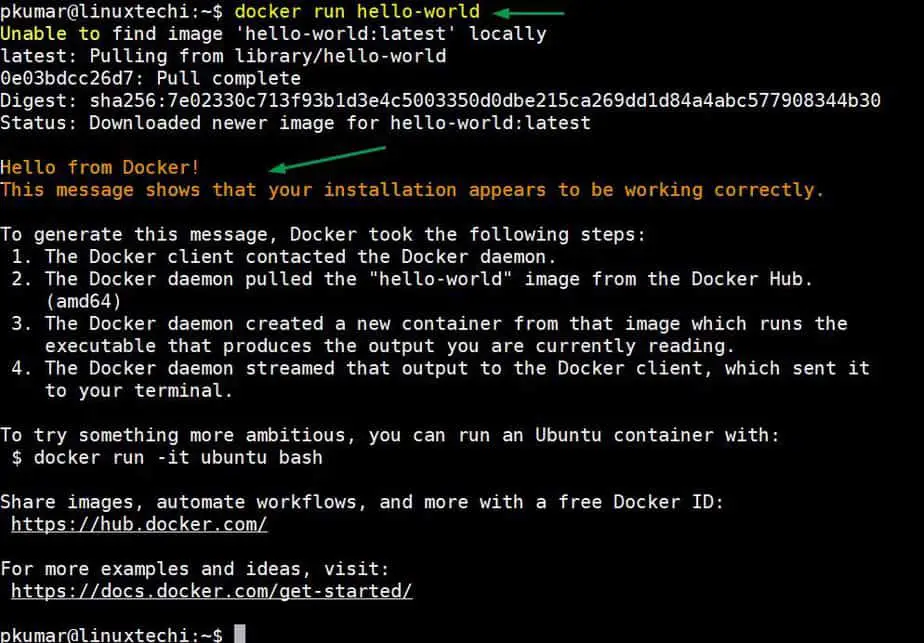
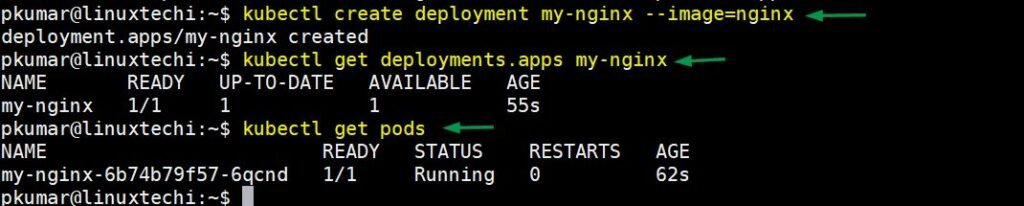
To test this cluster, let’s deploy nginx based application, run beneath commands,

$ oc new-app --name nginx-app --docker-image=nginx
$ oc get deployment
NAME        READY   UP-TO-DATE   AVAILABLE   AGE
nginx-app   1/1     1            1           2m2s
$ oc get pods
NAME                         READY   STATUS    RESTARTS   AGE
nginx-app-6d7c86dfd7-b6mvz   1/1     Running   0          2m4s
$
$ oc expose service nginx-app
route.route.openshift.io/nginx-app exposed
$ oc get route
NAME      HOST/PORT            PATH   SERVICES    PORT   TERMINATION   WILDCARD
nginx-app nginx-app-default.apps-crc.testing nginx-app 80-tcp         None

[sysadmin@openshift-rhel8 ~]$

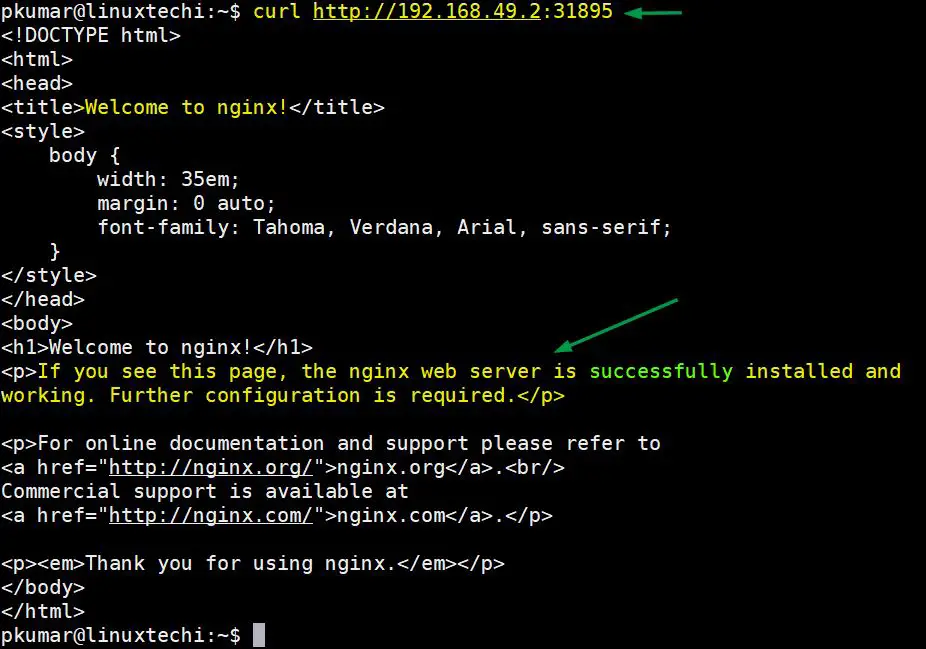
Now try to access the application using curl command,

$ curl nginx-app-default.apps-crc.testing

curl-nginx-app-openshift-rhel8

Perfect, above confirms that nginx based application has been deployed successfully on OpenShift cluster.

To Access OpenShift Web console, run

$ crc console

Above will open web browser and we will get OpenShift GUI login screen , Use the kubeadmin and its credentials

OpenShift-WebConsole-Login-RHEL8

After Entering the credentials, following dashboard will be presented

OpenShift-GUI-Dashboard-RHEL8

Great, above screen confirms that OpenShift Web GUI also is working fine.

Troubleshooting

To stop the cluster, run

$ crc stop

To Start the cluster again, run

$ crc start

To Terminate the cluster, run

$ crc stop
$ crc delete -f
$ crc cleanup

That’s all from this tutorial, I hope it helps you to setup single node openshift cluster on RHEL 8 system. Please don’t hesitate to share your feedback and comments.

Also Read : How to Setup NGINX Ingress Controller in Kubernetes

The post How to Setup Single Node OpenShift Cluster on RHEL 8 first appeared on LinuxTechi.

How to Install and Use Docker on Arch Linux

$
0
0

If you are in the IT industry, chances are high that you must have heard of Docker, unless you live inside a cave or a remote region completely shut out from the rest of the world. Docker is an opensource containerization technology that has revolutionized how developers develop and deploy applications. It allows development teams to build, manage and deploy applications inside containers. A Container is a standalone prebuilt software package that packs with its own libraries and dependencies. Containers run in complete isolation of the host operating system and from each other as well.

Docker offers immense benefits. Before containerization, developers used to encounter issues when writing and deploying code on various Linux flavors. An application would work perfectly well on one system only to fail on another system. Docker standardizes code deployment and ensures that the applications can run seamlessly across various computing environments without running into dependency issues or errors. Additionally, containers contribute to vast economies of scale. Docker is resource-friendly, lightweight, and quite efficient.

In this guide, we will install Docker on Arch Linux and will also learn how to use docker to run containers.

Prerequisites

  • Arch Linux instance with SSH access
  • A sudo user configured
  • Stable internet connection

Step 1) Install Docker on Arch Linux

There are various ways that you can use to install Docker. You can install the stable package that is hosted on the Arch community repository or install it from AUR.

However, we are going to install Docker on Arch Linux from the repository using the command as shown.

$ sudo pacman -S docker

install-docker-pacman-archlinux

Step 2)  Managing Docker

Docker runs as a daemon service just like other services such as Apache or SSH. This means you can start, stop, restart and enable Docker service.

Once the installation is complete, start docker and enable it to start on boot up using the commands below.

$ sudo systemctl start docker
$ sudo systemctl enable docker

To confirm that docker service is running, issue the command:

$ sudo systemctl status docker

The output below clearly shows that Docker is up and running.

docker-service-status-archlinux

To stop docker, invoke the command:

$ sudo systemctl stop docker

Additionally, you can confirm the version of Docker that you are running using the docker version command shown.

$ sudo docker version

Docker-version-archlinux

How to test and use docker

To test if everything is working as expected, we will run the following docker command to spin up a ‘hello-world‘ container

$ sudo docker run hello-world

When the command is invoked, docker contacts Docker hub and downloads a docker image called ‘hello-world’. Docker then creates a new container that runs the executable script that streams the message ‘Hello from Docker!’.

docker-run-hello-world-archlinux

To download or pull an image from Docker hub without running it, use the syntax:

$ sudo docker pull <image-name>

For example, to pul an Nginx image, run:

$ sudo docker pull nginx

docker-pull-nginx-archlinux

To check the images residing on your system invoke:

$ sudo docker images

docker-images-command-archlinux

From the output, you can see that we have two images so far: the Nginx and hello-world image that was downloaded earlier. The output provides additional information such as Repository, Image tag, Image ID, modification date and the size of the image.

To run an image, invoke the command:

$ sudo docker run <image-name>

However, running an image directly, may leave you with an unresponsive terminal as the image usually runs on the foreground. Therefore, it’s recommended to run it on the background using the -d option.

For example, to run the Nginx image in the background, execute:

$ sudo docker run -d nginx

docker-run-deattach-archlinux

To confirm current running containers, issue the command:

$ sudo docker ps

docker-ps-command-output-archlinux

To view all containers, both running and those that have previously been stopped, execute:

$ sudo docker ps -a

The output below gives us the current Nginx container and the ‘Hello-world’ container that we run previously.

docker-ps-a-command-archlinux

To stop a container, use the docker stop command followed by the container ID. For instance, to stop the Nginx container, execute:

$ sudo docker stop 968ff5caba7f

docker-stop-ps-command-archlinux

Some containers spawned from OS images may require some user interaction. For example, you might want to interact with a Ubuntu container image and access the shell to run commands. To achieve this, use the -it flag.

To better illustrate this, we are going to download the Ubuntu 20.04 docker image.

$ sudo docker pull ubuntu:20.04

We are now going to access the shell and run commands inside the container.

$ sudo docker run -it ubuntu:20.04

docker-run-ubuntu-20-04-archlinux

Sometimes, you may want to run a web server container and map its port to the host system to achieve this, use the -p option shown

$ sudo docker -p 8080:80 nginx

Port 80 is the port on which the Nginx container is listening to which is being mapped on port 8080 on the host. You can test this by accessing the Nginx web server using the host’s IP address as shown:

http://host-ip:8080

docker-nginx-webpage-archlinux

Conclusion

Docker is undoubtedly a powerful and robust tool especially in the DevOPs  field. It streamlines workflow and helps Developers to seamlessly build and deploy their applications without inconsistencies that come with different computing environments. We have barely scratched the surface as far Docker command usage is concerned. For more documentation, head over to the beginner’s guide. Additionally, there is the official documentation to help you out navigate Docker.

The post How to Install and Use Docker on Arch Linux first appeared on LinuxTechi.

How to Install and Use Docker on Ubuntu 20.04 / 20.10

$
0
0

Docker is a free and open source tool designed to build, deploy, and run applications inside containers. Host on which docker is installed is known docker engine. To work the docker engine smoothly, docker daemon service must always be running. For the applications where multiple containers are used then with the help of docker compose these containers are spin up as a service.

In this guide, we will demonstrate docker installation on Ubuntu 20.04 /20.10 and will also learn about docker compose installation and its usage.

Prerequisites

  • Ubuntu 20.04 / 20.10 along with ssh access
  • Sudo user with privilege rights
  • Stable Internet Connection

Let’s dive into Docker installation steps on Ubuntu 20.04 /20.10

Step 1) Install prerequisites packages for docker

Login to Ubuntu 20.04 /20.10 system and run the following apt commands to install docker dependencies,

$ sudo apt update
$ sudo apt install -y apt-transport-https ca-certificates curl gnupg-agent software-properties-common

Step 2) Setup docker official repository

Though the docker packages are available in default Ubuntu 20.04 /20.10 repositories but it is recommended to use docker official repository. To enable docker repository run below commands,

$ curl -fsSL https://download.docker.com/linux/ubuntu/gpg | sudo apt-key add -
$ sudo add-apt-repository \
"deb [arch=amd64] https://download.docker.com/linux/ubuntu \
$(lsb_release -cs) stable"

Step 3) Install docker with apt command

Now, we are all set to install latest and stable version of docker from its official repository. Run the beneath to install it

$ sudo apt-get update
$ sudo apt install docker-ce -y

Once the docker package is installed, add your local user to docker group by running following command:

$ sudo usermod -aG docker pkumar

Note: Make sure logout and login again after adding local user to docker group

Verify the Docker version by executing following,

$ docker version

Output of above command would be:

Check-Docker-Version-Ubuntu

Verify whether docker daemon service is running or not by executing below systemctl command,

$ sudo systemctl status docker

docker-service-status-ubuntu

Above output confirms that docker daemon service is up and running.

Step 4) Verify docker Installation

To test and verify docker installation, spin up a ‘hello-world’ container using below docker command.

$ docker run hello-world

This docker command will download ‘hello-world’ container image and then will spin up a container. If container displays the informational message, then we can say docker installation is successful.  Output of above ‘docker run’ would look like below.

docker-run-hello-world-container-ubuntu

Installation of Docker Compose on Ubuntu 20.04 / 20.10

To install docker compose on Ubuntu Linux, execute the following commands one after the another

$ sudo curl -L "https://github.com/docker/compose/releases/download/1.28.4/docker-compose-$(uname -s)-$(uname -m)" -o /usr/local/bin/docker-compose
$ sudo chmod +x /usr/local/bin/docker-compose

Check the docker-compose version by running following command,

$ docker-compose --version
docker-compose version 1.28.4, build cabd5cfb
$

Perfect, above output confirms that docker compose of version 1.28.4 is installed.

Test Docker Compose Installation

To test docker compose, let’s try to deploy WordPress using compose file. Create a project directory ‘wordpress’ using mkdir command.

$ mkdir wordpress ; cd wordpress

Create a docker-compose.yaml file with following contents.

$ vi docker-compose.yaml
version: '3.3'

services:
   db:
     image: mysql:latest
     volumes:
       - db_data:/var/lib/mysql
     restart: always
     environment:
       MYSQL_ROOT_PASSWORD: sqlpass@123#
       MYSQL_DATABASE: wordpress_db
       MYSQL_USER: dbuser
       MYSQL_PASSWORD: dbpass@123#
   wordpress:
     depends_on:
       - db
     image: wordpress:latest
     ports:
       - "8000:80"
     restart: always
     environment:
       WORDPRESS_DB_HOST: db:3306
       WORDPRESS_DB_USER: dbuser
       WORDPRESS_DB_PASSWORD: dbpass@123#
       WORDPRESS_DB_NAME: wordpress_db
volumes:
    db_data: {}

Save and close the file.

docker-compose-file-wordpress

As we can see, we have used two containers one for WordPress web and other one is for Database. We are also creating the persistent volume for DB container and WordPress GUI is exposed on ‘8000’ port.

To deploy the WordPress, run the below command from your project’s directory

$ docker-compose up -d

Output of above command would like below:

docker-compose-wordpress-ubuntu

Above confirms that two containers are created successfully. Now try to access WordPress from the Web Browser by typing URL:

http://<Server-IP-Address>:8080

Wordpress-installation-via-docker-compose-ubuntu

Great, above confirms that WordPress installation is started via docker-compose. Click on Continue and follow screen instructions to finish the installation.

That’s all from this guide. I hope you found this guide informative, please don’t hesitate to share your feedback and comments.

For more documentation on docker please refer : Docker Documentation

Also Read : How to Setup Local APT Repository Server on Ubuntu 20.04

The post How to Install and Use Docker on Ubuntu 20.04 / 20.10 first appeared on LinuxTechi.

How to Setup Docker Private Registry on Ubuntu 20.04

$
0
0

For Smooth CI/CD development using the docker platform, consider using a self-hosted docker registry server. Docker registry is the repository where you can store your docker images and pull them to run applications on the server. For faster delivery as well as secure infrastructure, it is recommended to set up your own docker private registry to store your docker images and distribute among organizations. In this article, we are going to learn how to setup docker private registry on Ubuntu 20.04

Prerequisites

  • User account with sudo privileges
  • A server for Docker registry
  • Nginx on the Docker Registry server
  • A client server
  • Docker and Docker-Compose on both servers.

Docker Private Registry

Docker Registry is a Server-side application which allows you to store your docker images locally into one centralized location. By setting up your own docker registry server, you can pull and push docker images without having to connect to the Docker hub, saving your bandwidth and preventing you from security threats.

Also Read : How to Install and Use Docker on Ubuntu 20.04 / 20.10

Before You start

Before starting, I ensure that you have installed Docker and Docker-Compose on both client server and local registry server. To verify you have installed required software, you can run the following commands to check the software version.

$ docker version

docker-version-output-linux

$ docker-compose version

docker-compose-version-output-linux

Also, you need to ensure that docker service is started and is setup to enable at boot time:

$ sudo systemctl start docker
$ sudo systemctl enable docker

Install and Configure Docker Private Registry

To configure Private Docker Registry, follow the steps:

Create Registry Directories

Configure your server that is going to host a private registry. Create a new directory that will store all the required configuration files.

Use the following command to create a new project directory ‘my-registry’ and two sub directories ‘nginx’ and ‘auth’. You can have your own assumption for the project name.

$ mkdir -p my-registry/{nginx, auth}

Now navigate to the project directory and create new directories inside nginx as:

$ cd my-registry/
$ mkdir -p nginx/{conf.d/, ssl}

Create Docker-Compose script and services

You need to create a new docker-compose.yml script that defines the docker-compose version and services required to set up a private registry.

Create a new file “docker-compose.yml” inside “my-registry” directory with vi editor.

$ vi docker-compose.yml

Define your service in the docker-compose file as:

services:
#Registry
  registry:
    image: registry:2
    restart: always
    ports:
    - "5000:5000"
    environment:
      REGISTRY_AUTH: htpasswd
      REGISTRY_AUTH_HTPASSWD_REALM: Registry-Realm
      REGISTRY_AUTH_HTPASSWD_PATH: /auth/registry.passwd
      REGISTRY_STORAGE_FILESYSTEM_ROOTDIRECTORY: /data
    volumes:
      - myregistrydata:/data
      - ./auth:/auth
    networks:
      - mynet

#Nginx Service
  nginx:
    image: nginx:alpine
    container_name: nginx
    restart: unless-stopped
    tty: true
    ports:
      - "80:80"
      - "443:443"
    volumes:
      - ./nginx/conf.d/:/etc/nginx/conf.d/
      - ./nginx/ssl/:/etc/nginx/ssl/
    networks:
      - mynet

#Docker Networks
networks:
  mynet:
    driver: bridge

#Volumes
volumes:
  myregistrydata:
    driver: local

Save and close the file

Setup nginx Port forwarding

We need to create nginx virtual host configuration for nginx web service. Go to nginx/conf.d/ directory created in the above step.

$ cd nginx/conf.d/

Now create a nginx virtual host file with your text editor. In this example I am going to name it myregistry.conf. You can have your own assumption.

$ vi myregistry.conf

Add the following contents:

upstream docker-registry {
    server registry:5000;
}
server {
    listen 80;
    server_name registry.linuxtechi.com;
    return 301 https://registry.linuxtechi.com$request_uri;
}
server {
    listen 443 ssl http2;
    server_name registry.linuxtechi.com;
    ssl_certificate /etc/nginx/ssl/certificate.crt;
    ssl_certificate_key /etc/nginx/ssl/private.key;
    # Log files for Debug
    error_log  /var/log/nginx/error.log;
    access_log /var/log/nginx/access.log;
    location / {
        if ($http_user_agent ~ "^(docker\/1\.(3|4|5(?!\.[0-9]-dev))|Go ).*$" )  {
            return 404;
        }
        proxy_pass                          http://docker-registry;
        proxy_set_header  Host              $http_host;
        proxy_set_header  X-Real-IP         $remote_addr;
        proxy_set_header  X-Forwarded-For   $proxy_add_x_forwarded_for;
        proxy_set_header  X-Forwarded-Proto $scheme;
        proxy_read_timeout                  900;
    }
}

Replace your domain name with server_name parameter and save the file.

Increase nginx file upload size

By default, nginx has a 1mb limit to upload files. As docker images exceed this limit, you need to increase the upload size in nginx configuration file. In this example, I am going to create an extra nginx configuration file with a 2GB upload limit .

Go to nginx configuration directory

$ cd myregistry/nginx/conf.d
$ vi additional.conf

Add the following line and save the file

client_max_body_size 2G;

Configure SSL certificate and Authentication

After creating nginx configuration file, now we need to set up an ssl certificate . You should have a valid ssl certificate file with a private key. Copy your certificate file and private key to nginx/ssl directory as:

$ cd myregistry/nginx/ssl
$ cp /your-ssl-certificate-path/certificate.crt .
$ cp /your-private-key-path/private.key .

If you do not have a valid purchased ssl certificate, you can generate your own self signed ssl certificate. Remember that a self signed ssl certificate is not recommended for production environments. To generate self signed ssl certificate, run the following command:

$ sudo openssl req -x509 -nodes -days 365 -newkey rsa:2048 -keyout \
 /etc/ssl/private/nginx-private.key -out /etc/ssl/certs/nginx-certificate.crt

You will be asked to submit some details like, Country code, domain name, email id. Fill up the details and continue.

Now setup Basic authentication as:

Go to auth directory

$ cd auth

Request a new password file named registry.password for your user. In this example I am going to use linuxtechi user.

$ htpasswd -Bc registry.password linuxtechi

If you get ‘htpasswd not found command‘, run the following command in your terminal and try again.

$  sudo apt install apache2-utils -y

Type a strong password and enter again to confirm your password. You have added a basic authentication user for docker registry.

Run Docker Registry

You have completed setup. You can build registry using docker-compose command.

Go to the directory, where we create docker-compose.yml file

$ cd myregistry

Now run the following command:

$ docker-compose up -d

Docker registry is now up, you can verify the running containers using following command:

$ docker ps -a

You will get following output:

docker-ps-a-command-output-linux

Pull Image from Docker Hub to a Private registry

To store an image from Docker hub to private registry, use docker pull command to pull docker images from docker hub. In this example, I am going to pull docker image of centos.

$ docker pull centos

After successfully pulling images from docker hub, tag an image to label it for private registry.

In this example, I am going to tag centos images as : registry.linuxtechi.com/linuxtechi-centos

$ docker image tag [image name] registry.linuxtechi.com/[new-image-name]

Example:

$ docker images tag centos registry.linuxtechi.com/linuxtechi-centos

To check if docker image is locally available or not , run the following command.

$ docker images

Push docker image to private registry

You have pulled docker image from docker hub and created a tag for private registry. Now you need to push local docker image to private registry.

Firstly, Login to your private registry using following command:

$ docker login https://registry.linuxtechi.com/v2/

Use your own registry url in the place of ‘https://registry.linuxtechi.com’

You will be prompted for username and password; you will get login successful message as:

docker-login-private-registry-linux

Now you can push your docker image to a private registry. To push image run the following command:

$ docker push registry.linuxtechi.com/linuxtechi-centos

Replace your image name after ‘docker push’

Once push is completed, you can go to browser and enter the url:

https://registry.linuxtechi.com/v2/_catalog

Replace registry.linuxtechi.com with your own url and provide basic authentication. You will find repositories list as :

docker-private-registry-gui-linux

Pulling docker image from Private Registry

You have pushed your local docker image to your private docker registry. In the same way you can pull docker images from your docker private registry to the local server.

Run the following command to login in your private registry server.

$ docker login https://registry.linuxtechi.com

Replace registry.linuxtechi.com with your own private registry url and provide basic authentication. Once the login is successful, run the following command to pull the docker image from private registry. In this example, I am going to pull previously pushed docker image in the local server. You can have your own assumption for docker image name.

$ docker pull registry.linuxtechi.com/linuxtechi-centos

You will have output similar as:

docker-pull-image-private-registry-linux

Conclusion:

In the article you have learned about how to host your own private docker registry. Also you got idea about how to pull images from docker hub to local server, tag the image and push into private registry. You have also learned how to pull docker images from private registry in the local server.

Also Read : How to Install KVM on Ubuntu 20.04 LTS Server (Focal Fossa)

The post How to Setup Docker Private Registry on Ubuntu 20.04 first appeared on LinuxTechi.

How to Create Disk Partitions with Parted Command in Linux

$
0
0

Managing storage devices is one of the essential skills that any Linux user or systems administrator worth his salt needs to have. There are numerous ways of creating disk partitions in Linux, both graphical and on the command-line. In this guide, we feature an opensource tool known as parted. Parted is a collaborative effort of two developers – Andrew Clausen and Lennert Buytenhek.

We are going to take you through the parted command along with how to create disk partitions.

Step 1) Verify the existence of the parted command-line tool

Most modern Linux systems ship with the parted tool. If the command-line is not already installed, proceed, and install it using the commands below:

For Debian / Ubuntu

$ sudo apt install -y parted

For CentOS / RHEL

$ sudo yum install -y parted
Or
$ sudo dnf install -y parted

For Fedora

$ sudo dnf install -y parted

Once installed, you can display the version of parted command as follows

$ sudo parted

This displays additional information including the hard disk volume – in this case, /dev/sda

Parted-Command-Verison

To exit, invoke the command quit as shown.

$ quit

Step 2) List existing disk partitions

To get an overview of the disk volumes attached to your system, run the parted command shown.

$ sudo parted -l

The command displays a host of information such as

  • Model or vendor of the hard disk
  • Disk partition & size
  • Partition table ( e.g msdos, gpt, bsd, aix, amiga, sun, mac and loop)
  • Disk flags (such as size, type, and information about the filesystem)

In our case, we have Ubuntu installed on VirtualBox. In effect, our hard disk (/dev/sda) which is 40GB in size, is a virtual hard disk. We also have an attached external volume labeled /dev/sdb of size 16G.

Parted-command-list-disk-linux

NOTE: The first partition of the hard drive – /dev/sda – is usually the boot partition and that’s where the bootloader and other OS files are stored. As such, it’s usually not a good idea to create a partition from this disk since it can cause corruption of the bootloader and render your system unbootable.

It’s a much safer bet to create new partitions on secondary disks such as /dev/sdb, /dev/sdc, /dev/sdd.

With this in mind, we will create a partition on the removable disk /dev/sdb.

Step 3) Create a partition table

To create a separate partition, First, select the target disk as shown

$ sudo parted /dev/sdb

Parted-command-dev-sdb-disk

If you are already in the parted prompt, simply use the command to switch to the target disk.

(parted) select /dev/sdb

Select-disk-with-parted-command-linux

Next, create a partition table using the mklabel command as follows.

(parted) mklabel gpt

If the disk is still mounted, you will get the warning below.

Label-disk-mklabel-command-linux

To proceed without any issues, you first need to unmount the volume. So, quit the parted prompt and unmount as follows:

$ sudo umount /mount/point

Our current partition table for the external volume is GPT. We will set it to msdos partition type by running the command:

(parted) mklabel msdos

You’ll get a  warning that the existing disk label will be destroyed and all the data deleted. But don’t worry. Your volume won’t get damaged. Just type ‘Yes’ and hit ENTER.

Set-msdos-label-with-mklabel-command-linux

You can verify the change made using the print command as shown.

(parted) print

Print-partition-table-label-parted-command

Step 4) Create the partition with mkpart

After creating the partition table, the next step is to create a new partition. So, run the mkpart command as shown.

(parted) mkpart

Next, select your preferred partition type. In our case, we selected primary.

Thereafter, you will be prompted to provide a filesystem type. Again, provide your preferred type and hit ENTER. In our case, we decided to go with ext4.

We will create a partition size of 8GB.

For the start value, select 1. For the end value, we will type in 8000 to represent 8000MB which is the equivalent of 8GB. Once done, use the print command to confirm the creation of the new volume.

mkpart-command-linux

Step 4) Format the newly created partition with mkfs

Once the partition is created, it acquires the suffix number 1 –  i.e  /dev/sdb1. You need to format and mount the partition for you to be able to interact with it.

To format the partition, use the mkfs command as shown. Here, we are formatting the partition as an ext4 filesystem.

$ sudo mkfs.ext4 /dev/sdb1

mkfs-format-disk-linux

Step 5) Mount the partition with mount command

Next, create a mount point using the mkdir command as shown.

$ sudo mkdir -p /media/volume

Then mount the disk partition to the mount point as shown.

$ sudo mount -t auto /dev/sdb1 /media/volume

Mount-Partition-with-mount-command

You can now use the df -Th command to verify that the partition is listed in the output.

And that’s where we wrap up this tutorial. We hope we have shed enough light on how to create disk partitions using the parted command in Linux.

Also ReadHow to Create Thin Provisioned Logical Volumes in Linux

The post How to Create Disk Partitions with Parted Command in Linux first appeared on LinuxTechi.

How to Install Ansible AWX on Ubuntu 20.04 LTS

$
0
0

Ansible AWX is a free and opensource front-end web application that provides a user interface to manage Ansible playbooks and inventories, as well as a REST API for Ansible. It is an open source version of Red Hat Ansible Tower. In this guide, we are going to install Ansible AWX on Ubuntu 20.04 LTS system. We have previously penned down a guide on how to install Ansible AWX on CentOS 8.

Prerequisites

Before we get started, ensure that Ubuntu 20.04 system has the following:

  • 4 GB of RAM
  • 3.4 GHz CPU with 2 Cores
  • Hard disk space 20 GB
  • Internet Connection

Let’s jump into Ansible AWX installation steps

Step 1) Update package index

Log in to your Ubuntu system and update the package lists as shown

$ sudo apt update

Step 2) Install docker-ce (community edition)

Ansible AWX services will be deployed inside containers, and for that, we need to install docker and docker-compose to run multiple container images. There two main editions of Docker – Enterprise Edition (EE) & Docker Community Edition (CE).

The Community Edition is freely available, and this is what we are going to use for our installation.

So, first, import the Docker repository GPG key as shown.

$ curl -fsSL https://download.docker.com/linux/ubuntu/gpg | sudo apt-key add -

Next, add the Docker Community Edition (CE) repository as shown

$ sudo add-apt-repository "deb [arch=amd64] https://download.docker.com/linux/ubuntu\
 $(lsb_release -cs) stable"

Next, update the package lists and install Docker as shown:

$ sudo apt update
$ sudo apt install -y docker-ce docker-ce-cli containerd.io

Once installed, add your local or regular user to the docker group so that regular user can run docker commands without the need for invoking the sudo command.

$ sudo usermod -aG docker $USER

Then restart the docker service.

$ sudo systemctl restart docker

Note: Do not forget to logout and login again, so that regular user can run docker commands without sudo.

Finally, you can confirm the docker version as shown

$ docker version

Docker-Verison-check-Ubuntu-20-04

Step 3) Install docker-compose

Next in line, we are going to install docker-compose. So, download the latest docker-compose file as shown

$ curl -s https://api.github.com/repos/docker/compose/releases/latest \
  | grep browser_download_url | grep docker-compose-Linux-x86_64 \
  | cut -d '"' -f 4 | wget -qi -

Docker-Compose-Download-Ubuntu

Next, assign execute permissions to the docker-compose file as shown.

$ sudo chmod +x docker-compose-Linux-x86_64

Then move the docker-compose file to the /usr/local/bin path as shown.

$ sudo mv docker-compose-Linux-x86_64 /usr/local/bin/docker-compose

Finally, verify the version of docker-compose as shown.

$ docker-compose version

Check-Docker-Compose-Version-Ubuntu

From the output, the docker-compose version is 1.28.5

Step 4) Install Ansible

Ansible is an open-source server automation and software provisioning tool that makes it possible to configure servers and deploy applications with ease. We are going to install Ansible which we shall later use to deploy AWX services.

Ansible is available on Ubuntu 20.04 repository, therefore use the APT command as shown.

$ sudo apt install -y ansible

Once the installation is completed, check the Ansible version as shown

$ ansible --version

Ansible-Version-Check-Ubuntu

Step 5) Install node and NPM (Node Package Manager)

Thereafter, install Node and NPM using the commands below

$ sudo apt install -y nodejs npm
$ sudo npm install npm --global

Step 6) Install and Setup Ansible AWX

We are going to download the AWX installer from the Github repository. But let’s first install git, pip, and when (password generator)

$ sudo apt install -y python3-pip git pwgen

Next, install the docker-compose module that matches your version of docker-compose.

$ sudo pip3 install docker-compose==1.28.5

We are now going to download the latest AWX zip file from Github. To do so, we will use the wget command as follows.

$ wget https://github.com/ansible/awx/archive/17.1.0.zip

Download-AWX-Installer-Wget

Once downloaded, unzip the file as shown.

$ unzip 17.1.0.zip

Once unzipped, be sure to locate the  awx-17.1.0 folder in your directory. Next, navigate into the installer directory inside the awx-17.1.0 folder.

$ cd awx-17.1.0 /installer

Then generate a 30 character secret key using the pwgen tool as follows:

$ pwgen -N 1 -s 30

pwgen-command-ansible-awx-ubuntu

Copy this key and save it somewhere. Next, open the inventory file that is in the same directory.

$ vi inventory

Uncomment the admin and password parameters and be sure to provide a strong admin password. This is the password that you will use to log in to AWX on the web login page.

admin_user=admin
admin_password=<Strong-Admin-password>

Additionally, update the secret key variable with the secret key generated earlier.

secret_key=lKjpI3Hdj2PWlp8De6g2pDj9e5dU5e

Step 7) Run the playbook file to Install AWX

Lastly, we are going to run the Ansible playbook file called install.yml as shown.

$ ansible-playbook -i inventory install.yml

This only takes a few minutes to complete.

Ansible-playbook-inventory-awx-ubuntu

Step 8) Access AWX Dashboard

To access the dashboard, launch your browser and browse the server’s IP as shown

http://server-ip-address

Ansible-AWX-Login-Page-Ubuntu

Provide your username and password and click on the ‘Log In’ button. This will usher you to the dashboard shown below.

Ansible-AWX-Dashboard-Ubuntu

And there you have it. We have successfully installed AWX on Ubuntu 20.04.

Also Read : How to Run and Schedule Ansible Playbook Using AWX GUI

The post How to Install Ansible AWX on Ubuntu 20.04 LTS first appeared on LinuxTechi.

How to Create Ansible Roles and Use them in Playbook

$
0
0

Ansible is an opensource configuration management and orchestration tool that makes it easy to automate IT tasks in a multi-tier IT environment. With a single command, you can configure multiple servers and deploy applications without logging into each of the servers and doing the configuration by yourself. In doing so, Ansible simplifies tasks that would otherwise be time-consuming and tedious.

With the increase in the number of playbook files executing various automation tasks, things can get a bit complex. And that’s where Ansible roles come in.

What is an Ansible role?

An ansible role is a concept within Ansible that deals with ideas rather than events. Essentially, a role is a level of abstraction used to simplify how playbook files are written. A role provides a skeleton for reusable components such as variables, modules, tasks, and facts which can be loaded onto a Playbook file.

Practical application

To get a better understanding of how roles are used, let us consider a scenario where you have 8 tasks to be performed on 2 remote nodes. One approach would be to define all the tasks to be executed on the remote hosts on a single playbook file. However, this is tedious and will most likely add to the complexity of the playbook. A better approach would be to create 8 separate roles whereby each role will perform a single task and later call these roles in the ansible-playbook file.

One of the most benefits of using roles is that each role is independent of the other. The execution of one role does not depend on the execution of another role. Also, roles can be modified and reused thus eliminating the need for rewriting the plays and tasks in the Playbook file.

So, let’s assume you want to create a playbook file to install the LAMP stack on a Debian server. A better way of doing this is to start by creating 3 separate roles where each will install Apache, MariaDB, and PHP respectively on the remote host. Then write a playbook and call the roles in the playbook file.  Suppose you have a second Debian server that you need to install Drupal CMS. Instead of rewriting the roles again, you can simply reuse the 3 roles you created earlier and add other roles for installing Drupal.

You get the drift?

Let’s now see how you can create Ansible roles.

How to create Ansible roles

To create a role, use the syntax below:

$ ansible-galaxy init role-name

For example, to create a role called my-role invoke the command.

$ ansible-galaxy init my-role

Ansible-Galaxy-init-role-ubuntu-linux

From the screen above, the command creates the my-role directory. This directory contains the following folders by default.

  • The ‘defaults’ folder – This contains the default variables that will be used by the role.
  • The ‘files’ folder – Contains files that can be deployed by the role.
  • The ‘handlers’ folder – Stores handlers that can be used by this role.
  • he ‘meta’ folder – Contains files that establish the role dependencies.
  • The ‘tasks’ folder – It contains a YAML file that spells out the tasks for the role itself. Usually, this is the main.yml file.
  • The ‘templates’ folder – Contains template files that can be modified and allocated to the remote host being provisioned.
  • The ‘tests’ folder – Integrates testing with Ansible playbook files.
  • The ‘vars’ folder – Contains variables that are going to be used by the role. You can define them in the playbook file, but it’s recommended you define them in this directory.

Ansible-role-tree-structure

Now, for demonstration, we are going to create three roles as follows:

  • The prerequisites role – Installs git
  • The mongodb role – Installs MongoDB database engine
  • The apache role – Installs the Apache webserver

So, using the same syntax we used earlier, we are going to create the roles as follows:

$ sudo ansible-galaxy init prerequisites
$ sudo ansible-galaxy init mongodb
$ sudo ansible-galaxy init apache

Creating-roles-in-ansible

The next step is to define each role that you have created. To achieve this, you need to edit the main.yml file located in the ‘tasks’ folder for each role.

role —>  tasks —> main.yml

For example, to edit the prerequisites role, navigate as shown:

$ cd prerequisites/tasks/

Then edit the main.yml file.

$ sudo vim main.yml

The role for installing git is defined as shown:

- name: Install git
  apt:
     name: git
     state: present
     update_cache: yes

prerequisities-yaml-file

For MongoDB, we have 2 tasks. Installing MongoDB and starting the Mongod daemon.

- name: Install MongoDB
  apt:
     name: mongodb
     state: present
     update_cache: yes

- name: Start Mongod daemon
  shell: "mongod &"

Mongodb-Install-yaml

And finally, for Apache web server :

- name: install Apache web server
  apt:
     name=apache2
     state=present
     update_cache=yes

Install-apache2-webserver-yaml

Lastly, we are going to create a playbook file called stack.yml and call the roles as shown.

---
- hosts: all
  become: yes
  roles:
        -  prerequisites
        -  mongodb
        -  apache

Main-Stack-Yaml

As you can see, the playbook file looks quite simple compared to defining each task for the host.

To ensure that our roles are working as expected, run the playbook file as shown.

$ sudo ansible-playbook /etc/ansible/stack.yml

The playbook will execute all the roles as shown.

Playbook-Execution-Output

To ensure that the packages were installed successfully, we are going to check their versions as shown:

$ mongod --version
$ apachectl -v
$ git --version

Ansible-Tasks-Verification

The output above confirms that indeed, the roles execute successfully and that the package were installed. Perfect!

Wrapping up:

Ansible roles simplify playbook files especially when you have multiple tasks to be executed across several hosts. Additionally, you can reuse roles for multiple hosts without the need of modifying the playbook file. If you found this guide useful, send us a shout and share it with your friends.

Read Also : How to Use Ansible Vault to Secure Sensitive Data

The post How to Create Ansible Roles and Use them in Playbook first appeared on LinuxTechi.

How to Install Apache Tomcat 10 on Debian 10 (Buster)

$
0
0

Apache Tomcat is free and open-source Java based HTTP Web server which offers the environment where Java code can run. In short Apache Tomcat is known as Tomcat. Recently Tomcat 10 has been released, so in this article, we will demonstrate on how to install and configure Apache Tomcat 10 on Debian 10 system.

Prerequisites

  • Debian 10 Installed System
  • Sudo privilege user
  • Stable Internet connection

Let’s dive into the installation steps of Apache Tomcat 10

Step 1) Install Java (JRE 8 or higher)

As Tomcat is Java based http web server, so we must install java on our system before start installing tomcat. Tomcat 10 needs at least JRE 8 or higher version. So, to install java run following commands,

$ sudo apt update
$ sudo apt install -y default-jdk

Once Java is installed, verify its version by executing below:

$ java --version

Java-Version-Check-Debian10

Step 2) Add Tomcat User

It is recommended to have tomcat user for tomcat services. So, create following tomcat user with home directory as ‘/opt/tomcat’ and shell as ‘/bin/false

Run the following useradd command,

$ sudo useradd -m -U -d /opt/tomcat -s /bin/false tomcat

Step 3) Download and Install Tomcat 10

Tomcat 10 packages are not available in Debian 10 package repositories, so we will download its compressed tar file from its official portal via below wget command,

$ wget \ 
https://downloads.apache.org/tomcat/tomcat-10/v10.0.4/bin/\
apache-tomcat-10.0.4.tar.gz

Extract the downloaded compress tar file using beneath tar command

$ sudo tar xpvf apache-tomcat-10.0.4.tar.gz -C /opt/tomcat --strip-components=1

Once the tar file is extracted, set the correct permissions on files and directories by running following commands,

$ sudo chown tomcat:tomcat /opt/tomcat/ -R
$ sudo chmod u+x /opt/tomcat/bin -R

Step 4) Configure Tomcat User via tomcat-users.xml file

To configure Tomcat users, edit the file ‘/opt/tomcat/conf/tomcat-users.xml’ and add following lines just before </tomcat-users> section.

$ vi /opt/tomcat/conf/tomcat-users.xml
………
<role rolename="manager-gui" />
<user username="manager" password="<SET-SECRET-PASSWORD>" roles="manager-gui" />
<role rolename="admin-gui" />
<user username="admin" password="<SET-SECRET-PASSWORD>" \
roles="manager-gui,admin-gui"/>
</tomcat-users>
……

Save and close the file.

Note : Don’t forget to set secret password in the above file.

Configure-Tomcat-Users-Debian10

Step 5) Allow Remote Access of Tomcat

By default, Admin GUI and Manager GUI are accessible from localhost, in case you want to access tomcat applications from outside then edit the context.xml file for manager & host-manager and comment out the remote access section. Example is shown below,

$ sudo vi /opt/tomcat/webapps/manager/META-INF/context.xml
……
<!--      <Valve className="org.apache.catalina.valves.RemoteAddrValve"
                 allow="127\.\d+\.\d+\.\d+|::1|0:0:0:0:0:0:0:1" />
  -->
…

Remote-Allow-Manager-Tomcat-Debian10

Save and close the file.

$ sudo vi /opt/tomcat/webapps/host-manager/META-INF/context.xml

Host-Manager-Remote-Allow-Tomcat-Debian10

Save and exit the file.

Step 6) Configure Systemd Unit File for Tomcat

By default, tomcat comes with shell scripts which allows the geeks to start and stop tomcat services. It is recommended to have systemd unit file for tomcat so that during reboots tomcat service comes up automatically. So, to configure systemd unit file, create the beneath file with following contents,

$ sudo vi /etc/systemd/system/tomcat.service
[Unit]
Description="Tomcat Service"
After=network.target

[Service]
Type=forking
User=tomcat
Group=tomcat

Environment="JAVA_HOME=/usr/lib/jvm/java-1.11.0-openjdk-amd64"
Environment="JAVA_OPTS=-Djava.security.egd=file:///dev/urandom"
Environment="CATALINA_BASE=/opt/tomcat"
Environment="CATALINA_HOME=/opt/tomcat"
Environment="CATALINA_PID=/opt/tomcat/temp/tomcat.pid"
Environment="CATALINA_OPTS=-Xms512M -Xmx1024M -server -XX:+UseParallelGC"

ExecStart=/opt/tomcat/bin/startup.sh
ExecStop=/opt/tomcat/bin/shutdown.sh

[Install]
WantedBy=multi-user.target

Save and close the file.

Now reload systemd daemon and start tomcat service by executing following commands,

$ sudo systemctl daemon-reload
$ sudo systemctl start tomcat.service

Run following systemctl command to verify tomcat service status

$ sudo systemctl status tomcat.service

Tomcat-ServiceStatus-Debian10

Also don’t forget to enable tomcat service so that it would be persistent across reboot.

$ sudo systemctl enable tomcat

Note: In case firewall is enable and running on your Debian 10 system then allow 8080 tcp port,

$ sudo ufw allow 8080/tcp

Step 7) Access Tomcat Web Interface (GUI)

To Access default web page of Tomcat 10, type following URL in web browser and then hit enter

http://<Server-IP-Address>:8080

Apache-Tomcat-10-Web-Page-Debian10

Perfect, above page confirms that Tomcat 10 has been installed successfully.

To Access Tomcat Web Manager page type

http://<Server-IP-Address>:8080/manager/

It will prompt for username and password, Use username as ‘admin’ and password that we specify in the file ‘/opt/tomcat/conf/tomcat-users.xml’ for admin-gui role

Tomcat-Web-Manager-GUI-Debian10

To Access Host Manager Web Page, type

http://<Server-IP-Address>:8080/host-manager/

Use username as admin and password that you specify in the file ‘/opt/tomcat/conf/tomcat-users.xml’

Tomcat-host-manager-web-page-Debian10

That’s all from this tutorial. I hope you have found it informative and please don’t hesitate to share your feedback and suggestions.

The post How to Install Apache Tomcat 10 on Debian 10 (Buster) first appeared on LinuxTechi.

How to Install AlmaLinux 8 Step by Step

$
0
0

The discontinuation of CentOS Linux by the CentOS Project in favor of CentOS Stream heralded a lot of uncertainty among developers and CentOS enthusiasts alike. In case you are behind the news, check out this announcement by CentOS Project. Many have opted to settle for other flavors such as Debian and OpenSUSE as a replacement given their stability and reliability which was a hallmark associated with CentOS.

The CloudLinux team stepped in and developed AlmaLinux to fill the gap left by the departure of CentOS Linux. Formerly known as Project Lenix, AlmaLinux is an open-source fork of RHEL 8 intended to fill the gap left by CentOS Linux. It promises to be completely free and is in fact binary compatible with RHEL8. In this guide, we show you how you can install AlmaLinux 8 step-by-step. If you have installed CentOS 8 / RHEL 8 before, then installing AlmaLinux will be a breeze given the similarities.

Without much further ado, let’s jump right in.

Prerequisites

Before you get started, here are a couple of things you need.

  • A copy of the AlmaLinux DVD ISO image. If you intend to install with GUI, the image is quite huge – about 8.6 GB – and therefore ensure you have a superfast connection. If your connection is not so good, you can leave it overnight to download or when you are away. Alternatively, you can settle for the minimal ISO image which is only 1.8 GB
  • Once you have downloaded your ISO image, grab a 16GB USB pen drive and make it bootable using the Rufus tool.
  • Ensure that your system has a minimum of 15 GB of hard disk space & 2GB RAM.
  • And of course, you will need a fast and stable internet connection to download the software packages during installation.

Step 1) Plug in the bootable USB drive

Right off the bat, plug the AlmaLinux bootable USB drive while your PC is still on and reboot. Be sure to check the BIOS settings and set the system to boot from the USB drive in the boot priority section and save the changes.

On the boot screen, press the Arrow Up key on your keyboard and press ENTER on the first option ‘Install AlmaLinux 8‘ to start the installation.

Choose-Install-AlmaLinux8

This will be shortly followed by the boot messages as shown. Just let the system initialize

AlmaLinux8-Boot-Message-During-Installation

Step 2) Select AlmaLinux 8 Installation Language

Once the system is done initializing, the AlmaLinux window will come into view as shown. Select your preferred installation language and click the ‘Continue’ button.

Language-Selection-AlmaLinux8-Installation

Step 3) Installation Summary of AlmaLinux

In the next step, you will get an installation summary presenting a list of settings that need to be configured before proceeding any further. We will begin by configuring the 4 crucial settings which are:

  • Partitioning – Installation destination
  • Network and hostname
  • User Settings
  • Software Selection

AlmaLinux8-Installation-Summary-window

Step 4) Configure partitioning (Installation destination)

To configure partitioning, click on the ‘Installation Destination’ section as shown.

Installation-Destination-AlmaLinux8-Installation

Just click on the hard drive and ensure that there’s a white check mark on the hard drive icon.

Custom-Partitioning-Scheme-AlmaLinux8-Installation

For partitioning scheme, we have two options ‘Automatic’ and ‘custom

If you are new to Linux, then You can opt to leave the partitioning to ‘Automatic’. With this option, the installer automatically and intelligently partitions your hard drive and saves you the agony of manual partitioning.

In case you want to create customize partition scheme then choose ‘custom’ method. In this article, I will create custom partition partition by choosing the ‘custom’ option.

Once you are done, click on the ‘Done’ button in the far-left corner.

As I have 40GB hard drive, so will be creating following LVM based partitions

  • /boot   – 2 GB (ext4)
  • /home – 10 GB (xfs)
  • /   – 25 GB (xfs)
  • Swap – 2GB

So, let’s create our first partition as /boot. Choose LVM and then click on plus symbol and then specify the mount point as /boot and size as 2 GB.

Boot-Partition-AlmaLinux8-Installation

Click on ‘Add mount point

In the next screen change the file system from xfs to ext4 and then click on ‘Update Settings’.

Change-Filesystem-Type-Boot-Partition-AlmaLinux8

Create next partition as /home of size of 10 GB

Home-Partition-Creation-AlmaLinux8-Installation

Click on ‘Add mount point

Similarly, create remaining two partitions as / and swap of size 25 GB and 2 GB respectively.

Slash-Partition-Creation-AlmaLinux8-Installation

Swap-Partition-AlmaLinux-Installation

Once we are done with partition creation, then click ‘Done’ option as shown below,

Choose-Done-After-Partition-Creations-AlmaLinux8

In the next screen, choose ‘Accept Changes’ to write changes into the disk.

Accept-Changes-AlmaLinux8-Installation

Step 5) Configure Network and Hostname

By default, the networking capability is turned off. We need to enable networking for our system to get connected to the internet which will be required for the installation of packages and setting up accurate Time and Date.

So, click on the ‘Network and Hostname’ section.

Choose-Network-Hostname-Option-AlmaLinux

On the ‘Network & Hostname’ window, turn on the Ethernet connection that corresponds to your network interface as shown.

Enable-Networking-AlmaLinux8-Installation

In the bottom section, you can also set your preferred hostname. By default, this is set to localhost.localdomain. Feel free to specify your preferred hostname and click on the ‘Apply’ button.

Set-Hostname-AlmaLinux8-Installation

Finally, click on the ‘Done’ button at the top right corner to save the changes.

Step 6)  Configure User settings

Next, we need to set a root user and password for the root user. The root user has absolute privileges in the system and can make any changes needed. Therefore, under ‘USER SETTINGS’, click on the ‘Root Password’ section as shown.

Root-User-Settings-AlmaLinux8-Installation

To create the root user, be sure to provide the root password and confirm it as shown. For security purposes, provide a strong password with a combination of uppercase, lowercase, numeric and special characters.

Set-Root-User-Password-AlmaLinux8

Thereafter, you will be required to create a regular user that you will use to log in for the first time. So, click on the ‘User creation’ option as shown below.

User-Creation-AlmaLinux8-Installation

Provide the full name and the username of the user. Then provide the password and confirm it as shown.

Local-User-Creation-AlmaLinux8-Installation

Step 7) Configure Software Selection

By default, the Base environment is set to ‘Server with GUI’. If you need to change this and select other options, click on the ‘Software Selection’ as shown.

Default-Server-GUI-Selection-AlmaLinux8-Installation

Feel free to select your preferred base environment or pick any additional software for your selection and click on the ‘Done’ button to return to the summary Window.

Choose-Done-After-Software-Selection-AlmaLinux8

Step 8 ) Begin the installation

With all the main settings configured, click on the ‘Begin Installation’ at the bottom right corner to begin the installation.

Begin-AlmaLinux8-Installation

This takes a while as the system installs and configures all the necessary software packages, libraries, and boot files.  It’s therefore an ideal moment to take a break and rush to the grocery store or grab a cup of hot chocolate 🙂

AlmaLinux8-Installation-Progress

Once the installation is done, you will see the word ‘Complete!’ on the progress bar.  At this point, AlmaLinux is installed on your system. You can now hit the ‘Reboot’ button & eject your bootable USB medium.

Reboot-System-After-AlmaLinux8-Installation

Step 9) Accept the License agreement

Once the system has rebooted, click on the ‘License Information’ section as shown.

AlmaLinux8-License-Information

Accept the license agreement by ticking the checkbox circled below and click on ‘Done’ to go back.

Accept-License-Agreement-AlmaLinux8

And finally, click on ‘FINISH CONFIGURATION’ to finalize the installation.

Finish-Configuration-AlmaLinux8-Installation

Step 10) Log in to AlmaLinux

The AlmaLinux login page will come into view, requiring you to log in. Simply provide your password and click on the ‘Sign In’ button.

AlmaLinux8-Login-screen-After-Installation

Thereafter, you will be ushered to the stunning AlmaLinux desktop as shown.

AlmaLinux8-Dashboard-After-Installation

Congratulations! You have successfully installed AlmaLinux. You can now update the system packages and perform other post-installation tasks as you deem fit.

The post How to Install AlmaLinux 8 Step by Step first appeared on LinuxTechi.

How to Install NFS Server on Ubuntu 20.04 (Focal Fossa)

$
0
0

Originally developed by Sun’s Microsystems, NFS is an acronym for Network File System. It is a distributed protocol that allows a user on a client PC to access shared files from a remote server much the same way they would access files sitting locally on their PC. The NFS protocol provides a convenient way of sharing files across a Local Area Network (LAN). In this guide, we will walk you through the installation of the NFS Server on Ubuntu 20.04 LTS (Focal Fossa). We will then demonstrate how you can access files on the server from a client system.

Lab setup

NFS Server          IP:  192.168.2.103       Ubuntu 20.04
Client System       IP:  192.168.2.105       Ubuntu 20.04

Step 1) Install the NFS kernel Server package

To get started we are going to install the NFS kernel server package on Ubuntu which will, in effect, turn it into an NFS server. But first, let’s update the package list as shown.

$ sudo apt update

Thereafter, run the following command to install the NFS kernel server package.

$ sudo apt install nfs-kernel-server

This installs additional packages such as keyutils, nfs-common, rpcbind, and other dependencies required for the NFS server to function as expected.

You can verify if the nfs-server service is running as shown

$ sudo systemctl status nfs-server

NFS-Server-Status-Ubuntu-20-04

Step 2) Create an NFS directory share

The next step will be to create an NFS directory share. This is the directory in which we will place files to be shared across the local area network. We will create it in the /mnt/ directory as shown below. Here, our NFS share directory is called /my_shares. Feel free to assign any name to your directory.

$ sudo mkdir /mnt/my_shares

Since we want all the files accessible to all clients, we will assign the following directory ownership and permissions.

$ sudo chown nobody:nogroup /mnt/my_shares
$ sudo chmod -R 777 /mnt/my_shares

These permissions are recursive and will apply to all the files and sub-directories that you will create.

Step 3) Grant the NFS Server access to clients

After creating the NFS directory share and assigning the required permissions and ownership, we need to allow client systems access to the NFS server. We will achieve this by editing the /etc/exports file which was created during the installation of the nfs-kernel-server package.

So, open the /etc/exports file.

$ sudo vi /etc/exports

To allow access to a single client, add the line below and replace the client-IP parameter with the client’s actual IP.

/mnt/my_shares client-IP(rw,sync,no_subtree_check)

To add more clients to the list, simply specify more lines as shown:

/mnt/my_shares client-IP-1(rw,sync,no_subtree_check)
/mnt/my_shares client-IP-2(rw,sync,no_subtree_check)
/mnt/my_shares client-IP-3(rw,sync,no_subtree_check)

Additionally, you can specify an entire subnet a shown.

/mnt/my_shares 192.168.0.0/24 (rw,sync,no_subtree_check)

This allows all clients in the 192.168.0.0 subnet access to the server. In our case, we will grant all clients access to the NFS server as shown

/mnt/my_shares 192.168.2.0/24(rw,sync,no_subtree_check)

NFS-Server-Exports-file-Ubuntu-20-04

Let’s briefly brush through the permissions and what they stand for.

  • rw  (Read and Write )
  • sync  (Write changes to disk before applying them)
  • no_subtree_check  (Avoid subtree checking )

Step 4 ) Export the shared directory

To export the directory and make it available, invoke the command:

$ sudo exportfs -a

Step 5) Configure the firewall rule for NFS Server

If you are behind a UFW firewall, you need to allow NFS traffic across the firewall using the syntax shown.

$ sudo ufw allow from [client-IP or client-Subnet-IP] to any port nfs

In our case, the command will appear as follows:

$ sudo ufw allow from 192.168.2.0/24 to any port nfs

Firewall-Rule-NFS-Server-Ubuntu-20-04

We are all good now with configuring the NFS Server. The next step is to configure the client and test if your configuration works. So, let’s proceed and configure the client.

Step 5) Configure the Client system

Now log in to the client system and update the package index as shown.

$ sudo apt update

Next, install the nfs-common package as shown.

$ sudo apt install nfs-common

Install-NFS-Common-Client-Package

Then create a directory in the /mnt folder on which you will mount the NFS share from the server.

$ sudo mkdir -p /mnt/client_shared_folder

Finally, mount the remote NFS share directory to the client directory as follows.

$ sudo mount 192.168.2.103:/mnt/my_shares /mnt/client_shared_folder

Mount-NFS-share-on-client-machine

Step 6) Testing the NFS Share setup

To test if our configuration is working, we are going to create a test file in the NFS directory as shown

$ cd /mnt/my_shares
$ touch nfs_share.txt

Test-NFS-Server-Ubuntu-20-04

Now, let’s get back to our client and see if we can see the file in our mounted directory

$ ls /mnt/client_shared_folder/

And voila! There goes our file as shown in the snippet below. This is confirmation that our setup was successful.

List-NFS-Files-Client-Ubuntu

That’s it for today. We hope this guide was beneficial to you and that you can comfortably share files using NFS on your network.

Read Also : How to Install KVM on Ubuntu 20.04 LTS Server (Focal Fossa)

The post How to Install NFS Server on Ubuntu 20.04 (Focal Fossa) first appeared on LinuxTechi.

How to Use Handlers in Ansible Playbook

$
0
0

In Ansible, a handler is just like any other task but only runs when called or notified. It takes action when a change has been made on the managed host. Handlers are used in initiating a secondary change such as starting or restarting a service after installation or even reloading a service after some modifications have been made in the configuration files.  In this guide, we will shed more light on Ansible handlers. We will learn how to use handlers in ansible playbook.

Ansible playbook file with a handler

To better understand how Handlers work, we will take an example of a playbook file – install_apache.yml – that installs the Apache webserver and later restarts the Apache service. In the example below, the handler is notified to restart the Apache service soon after installation. This is achieved using the notify module as shown. Note that the ‘notify’ name should coincide with the handler name as pointed out, otherwise you will encounter errors in your playbook file.

---
- hosts: staging
  name: Install
  become: yes
  tasks:
          - name: Install Apache2 on  Ubuntu server
            apt:
                    name: apache2
                    state: present
                    update_cache: yes
            notify:
                    - Restart apache2

 handlers:
          - name: Restart apache2
            service:
                    name:  apache2
                    state: restarted

Ansible-Playbook-with-Handlers

Now let’s run the playbook file.

$ ansible-playbook /etc/ansible/install_apache.yml -K

From the output, you can see the Handler being executed right after the task.

Ansible-Playbook-Execution-Handlers

Multiple tasks with multiple handlers

Additionally, we can have several tasks calling multiple handlers. Consider the playbook file below.

Here are have 2 tasks to run:

  • Installing Apache webserver
  • Allowing HTTP traffic on the UFW firewall.

After the tasks are successfully executed, I have called each of the handlers with the ‘notify’ module as shown below. The first handler restarts Apache and the second one reloads the UFW firewall.

---
- hosts: staging
  name: Install
  become: yes
  tasks:
         - name: Install Apache2 on  Ubuntu server
           apt:
                   name: apache2
                   state: present
                   update_cache: yes

         - name: Allow HTTP traffic on UFW firewall
           ufw:
                   rule: allow
                   port: http
                   proto: tcp

           notify:
                   - Restart apache2
                   - Reload ufw firewall
  handlers:
          - name: Restart apache2
            service:
                    name:  apache2
                    state: restarted

          - name: Reload ufw firewall
            ufw:
                    state: enabled

Multiple-Handlers-Ansible-Playbook

When the playbook file is executed,  both handlers are executed by Ansible right after Apache is installed and HTTP traffic is allowed on the firewall.

The secondary actions executed by the handlers here are:

  • Restarting Apache
  • Enabling and reloading the firewall for the changes made to be effected.

Ansible-Playbook-Execution-Multiple-Handlers

Conclusion

As you have seen, handlers are just like regular tasks, only that they are referenced using a globally unique module called ‘notify’. If a handler is no notified, it fails to run. Remember that all handlers run after all the tasks have been completed.

Also ReadHow to Create Ansible Roles and Use them in Playbook

The post How to Use Handlers in Ansible Playbook first appeared on LinuxTechi.

How to Monitor Linux System with Glances Command

$
0
0

In the past, we have covered quite a number of command-line monitoring tools in Linux.  These include vmstat, htop and top command to mention a few. The top command is the most widely used command since it comes preinstalled and gives a real-time performance of the system in addition to displaying the running processes. In this guide, we will pay more attention to an intuitive and user-friendly command-line tool known as glances.

Based  in Python, Glances is a free and opensource cross-platform command-line monitoring tool that provides a wealth of information about your system’s performance. You can monitor system metrics such as memory & CPU utilization, network bandwidth, Disk I/O, File systems, and running processes to mention a few.

Glances displays metrics in an intuitive and visually appealing format. It prints out detailed information about metrics such as:

  1. System’s uptime & IP address ( Private & public )
  2. Memory utilization ( Main memory , swap , available memory ).
  3. CPU utilization.
  4. Disk mount points.
  5. Disk I/O & read and write speeds.
  6. CPU load average , date and time
  7. Running processes including active and sleeping processes.
  8. Network bandwidth ( Including upload and download rates ).

How to install Glances on Linux distributions

Glances is not installed by default. Let’s see how we can install Glances in major Linux distributions.

On Ubuntu / Debian / Mint

For newer versions of Ubuntu & Debian, simply type:

$ sudo apt install -y glances

For older versions, Add the PPA

$ sudo apt-add-repository ppa:arnaud-hartmann/glances-stable

Next, update the package lists and install glances as shown.

$ sudo apt update
$ sudo apt install -y glances

On CentOS 8 / RHEL 8

For CentOS & RHEL, first install the EPEL package:

CentOS 8

$ sudo dnf install epel-release

RHEL 8

$ sudo dnf install https://dl.fedoraproject.org/pub/epel/epel-release-latest-8.noarch.rpm

Thereafter, update the repositories.

$ sudo dnf update

And install glances.

$ sudo dnf install -y glances

Glances is also available as a snap package. Thus, it can be installed  across all Linux systems with snap enabled as shown:

$ sudo snap install glances

In addition, since Glances is written in Python, you can also use the pip package manager to install it as shown. But first ensure pip is installed on your system.

$ pip3 install glances

For other installation procedures  check out this documentation on GitHub.

Monitor system metrics in Standalone mode (local system)

Launching Glances to monitor your local system (standalone mode) is quite a breeze. Simply run the glances command below without any command options.

$ glances

Right off the bat, you can see some system metrics starting with the private & public IP addresses at the very top and the uptime at the top right corner of the terminal. Just below that you can view other system metrics such as CPU & memory utilization, network bandwidth rate, running processes, disk volumes etc.

Glances-Command-Output-Linux

Below is a screenshot from a CentOS 8 system.

Glances-Command-CentOS8

To view these statistics on a web browser, use the -w option as shown. This will generate a link as shown which you will copy to your web browser

$ glances -w

Start-Glances-Web-Browser-Linux

This starts glances on port 61208 and render the statistics on the browser as shown.

Access-Glances-from-browser

You can secure the web GUI, by configuring  a password to allow authorized users only using the –password flag.

$ glances -w --password

The username , by default, is glances

Configure-Password-for-Glances

The next time to try to log in, you will be prompted for a password as shown.

UserName-Password-For-Accessing-Glances

Monitor system metrics in Server mode

The glances command can also be used to monitor a remote host. Just pass the -s option to initialize glances in server mode as seen below.

Start-Glances-in-Server-Mode

From the client PC, run the glances command as shown to access the server’s metrics.

$ glances -c server-IP-address

Below is a screenshot of the server metrics from Windows Command prompt shell.

Access-Glances-Command-Line-Client

Glances alerts

Glances makes it easier to spot and narrow down to an issue through the use of color codes in displaying the system metrics You might be wondering what the are various color-codes imply on the glances , well here’s a breakdown.

  • GREEN: OK (everything is fine)
  • BLUE: CAREFUL (need attention)
  • VIOLET: WARNING (alert)
  • RED: CRITICAL (critical)

The thresholds are configured , by default , as

  • careful=50
  • warning=70
  • critical=90

These are not cast in stone and can be further customized in the glances configuration file at the /etc/glances/glances.conf path.

Glances-Conf-File-Linux

Summary

Glances is a handy tool, and in more ways feels like an improved version of top or htop command. It provides dynamic real time system metrics which can be rendered on a web browser & retrieved remotely on command-line.

$ glances -h

Glances-Help-Linux

The post How to Monitor Linux System with Glances Command first appeared on LinuxTechi.

GoAccess – Analyze Real-Time Apache and Nginx Logs

$
0
0

One of the primary roles of any systems administrator is viewing and analyzing log files. Web server log files from other Apache and Nginx can build up over time and examining them can prove to be a tedious and time-consuming activity. Thankfully, GoAccess can alleviate all that stress and enable you to seamlessly monitor and analyze web server log files.

Written in C programming language, GoAccess is an opensource, terminal-based real-time web log analyzer. It’s fast, interactive, and displays the logs in an elegant and intuitive fashion. It provides support for a wide variety of web log files including Apache, Nginx, Caddy, Amazon S3, and CloudFront to mention just a few. It can render the results in HTML format, JSON, and also generate a CSV report.

In this guide, we will focus on how to install goaccess and use it to analyze real-time Apache and Nginx web server logs.

GoAccess allows you to view the following log metrics:

  • Daily unique visitors
  • Requested files
  • Static requests ( jpg, pdf, png, mp4, avi, etc)
  • Not found (404) requests
  • Visitors’ hostname and IP details
  • Visitor’s Operating system & browser details
  • Geo Location

How to install GoAccess

There are two main ways of installing GoAccess on your Linux system. You can either build from source or use your distribution’s package manager. Let’s check out how you can accomplish doing both.

Install GoAccess on various distributions

Here’s how you can install GoAccess on various Linux distributions.

On Ubuntu / Debian distributions

If you are running Ubuntu or any Debian-based system, execute:

$ sudo apt install -y goaccess

On RHEL / CentOS

For RHEL and CentOS-distros, run the command:

$ sudo yum install -y goaccess
or$ sudo dnf install -y goaccess

On Fedora

On Fedora, run the command:

$ sudo dnf install goaccess -y

On Arch Linux

For Arch Linux and other Arch-distros such as Arch Linux and Manjaro, run the command.

$ sudo pacman -S goaccess

For other distributions such as OpenSUSE and UNIX flavors such as FreeBSD, visit the official GoAccess download link.

Install GoAccess from source

To install from source, first, download the GoAccess tarball file using wget command

$ wget https://tar.goaccess.io/goaccess-1.4.6.tar.gz

Extract the tarball file with beneath tar command

$ tar -xvf goaccess-1.4.6.tar.gz

Then, navigate into the directory and build from source as shown.

$ cd goaccess-1.4.6/
$ ./configure --enable-utf8 --enable-geoip=mmdb
$ make
# make install

Verify the installation

To confirm that GoAccess has been installed, run the following command.

$ goaccess

This will print or display the command usage and command options as shown.

goacces-command-output-linux

In addition, you can check the version of GoAccess as shown.

$ goaccess --version

goaccess-version-check-linux

How to use GoAccess to Monitor Ream-Time Apache & Nginx logs

Once you have installed GoAccess, The next step is to monitor the web log files. In this example, we have the Apache web server installed and we are going to monitor the access.log file to view statistics on how clients are interacting with the web server from a browser.

The -f option allows you to view real-time the logs on the command line

$ goaccess -f /var/log/apache2/access.log --log-format=COMBINED

Goaccess-Apache2-logs-Combined

Your web server’s log statistics will be printed on the terminal including total requests, valid requests, valid visitors, unique files and so many more.

Apache2-Logs-Audit-Linux-Terminal

Be sure to scroll down to view other web server statistics such as Not Found 404 requests, visitor hostnames, and IP addresses.

Apache2-Access-logs-Linux

Here, we have statistics on the operating systems and web browsers from which the visitors are accessing the web server.

Apache2-WebServer-Statistics-Logs-Linux

To monitor Nginx logs, use the same drill as you did when monitoring Apache logs. Just switch to root user and run the command below.

# goaccess -f /var/log/nginx/access.log --log-format=COMBINED

Goaccess-nginx-access-log-combined-linux

Here, we are monitoring the access.log  file for the Nginx web server

Nginx-WebServer-Realtime-Logs

Visibly, the dashboard is strikingly similar to what we had when monitoring Apache logs

View logs output on a web dashboard

You can also render the web server logs on elegant and intuitive dashboards by redirecting the output in an html file as shown. Here’s we have specified the output file as reports.html.

$ goaccess -f /var/log/apache2/access.log --log-format=COMBINED > reports.html

Next, open your web browser and browse the location of the file which will immediately render the logs in beautiful dashboards as shown.

Goaccess-webserver-reports-broswer

Summary

GoAccess is a useful tool that gives you tons of insights about your web server’s interaction with visitors on your website. It allows you to obtain a wealth of detailed information about visitors’ interaction with your site that can prove useful in reaching a wider audience and improving user experience.

The post GoAccess – Analyze Real-Time Apache and Nginx Logs first appeared on LinuxTechi.

How to Create and Use Custom Facts in Ansible

$
0
0

Custom facts (local facts) are the variables which are declared on ansible managed host. Custom facts are declared in ini or json file in the /etc/ansible/facts.d directory on managed host. File names of custom facts must have .fact extension.

In this article, we will cover how to create and use custom  facts to install samba file server and starts its service on ansible managed host. Here we are using host1 and host2 as a part of fileservers group in the inventory.

To demonstrate custom facts, following is my lab setup

  • control.example.com —  10.20.0.57
  • host1.example.com   —  10.20.0.10       // Ansible Managed Host
  • host3.example.com   — 10.20.0.30         // Ansible Managed Hosts

Note : devops user is configured on ansible control and managed hosts with sudo rights. Inventory and ansible.cfg file is defined under /home/develops/install directory. Content of my inventory are shown below:

[devops@control install]$ cat inventory
[fileservers]
host1.example.com
host3.example.com

[dbservers]
host2.example.com
host1.example.com
[devops@control install]$

Logical steps to declare and use custom local facts are

  • Create a facts file on ansible control host with .fact extension
  • Create one play in the playbook to create a folder ‘/etc/ansible/facts.d’ and copy the facts file on managed hosts on this folder.
  • Create 2nd play in the playbook which will use these custom facts using ansible_local.<facts-filename>.<fact-name>.<variable-name> to install samba server and start its service.

Let’s dive into the actual implementation of custom or local facts.

Step 1) Create custom facts file on control node

Let’s create customfacts.fact file with the following contents

[devops@control install]$ cat customfacts.fact
[localfacts]
pkgname = samba
srvc = smb
[devops@control install]$

Here localfacts is factname and pkgname & srvc are variables.

Step 2) Create a playbook with two different plays

Create customfacts-install.yaml playbook with following contents

[devops@control install]$ vi customfacts-install.yaml
---
- name: Install custom facts
  hosts: fileservers
  vars:
    remote_dir: /etc/ansible/facts.d
    facts_file: customfacts.fact
  tasks:
  - name: Create Facts Dir on Managed Hosts
    file:
      path: "{{ remote_dir }}"
      state: directory
      recurse: yes
  - name: Copy Contents to Facts file
    copy:
      src: "{{ facts_file }}"
      dest: "{{ remote_dir }}"

- name: Install Samba Server with Custom Facts
  hosts: fileservers
  tasks:
  - name: Install SMB
    package:
      name: "{{ ansible_local.customfacts.localfacts.pkgname }}"
      state: present
  - name: Start SMB Service
    service:
      name: "{{ ansible_local.customfacts.localfacts.srvc }}"
      state: started
      enabled: yes

save and exit the file.

Customfacts-ansible-playbook

Step 3) Run the playbook on fileservers

We will execute the playbook on fileservers, before running it, let’s verify the connectivity from control node towards these nodes.

[devops@control install]$ ansible fileservers -m ping

ping-pong-test-ansible

Above confirms that ping pong is working fine, so let’s run the ansible playbook using beneath command,

[devops@control install]$ ansible-playbook customfacts-install.yaml

Customfacts-Ansible-playbook-execution

Above output shows that playbook has been executed successfully. Let’s verify the installation of custom facts and samba service.

Step 5) Verify Custom local facts and Samba Service

Run below ansible ad-hoc  command to verify custom facts installation,

[devops@control install]$ ansible fileservers -m setup -a "filter=ansible_local"

Customfacts-installation-verification

Verify samba server’s service status by executing below:

[devops@control install]$ ansible fileservers -m command -a "systemctl status smb"

Ansible-Ad-hoc-command-verify-samba-installation

Perfect, above output confirms that Samba has been installed successfully and its service is up and running.

That’s all from this article, I hope you get the basic idea about custom facts installation and its usage.

Read Also : How to Use Handlers in Ansible Playbook

The post How to Create and Use Custom Facts in Ansible first appeared on LinuxTechi.

How to Install Minikube on Ubuntu 20.04 LTS / 21.04

$
0
0

As the name suggests, minikube is a single node Kubernetes (k8s) cluster. Anyone who is new to the Kubernetes and wants to learn and try deploying application on it, then minikube is the solution. Minikube provides a command line interface to manage Kubernetes (k8s) cluster and its component.

In this article we will cover the installation of Minikube on Ubuntu 20.04 LTS / 21.04.

Minimum system requirements for minikube

  • 2 GB RAM or more
  • 2 CPU / vCPU or more
  • 20 GB free hard disk space or more
  • Docker / Virtual Machine Manager – KVM & VirtualBox

Note: In this article, I will be using Docker container as a base for minikube. In case, docker is not installed on your ubuntu system then use following URL to install it.

Prerequisites for minikube

  • Minimal Ubuntu 20.04 LTS / 21.04
  • Sudo User with root privileges
  • Stable Internet Connection

Let’s dive into the Minikube Installation steps on Ubuntu 20.04 LTS / 21.04

Step 1) Apply updates

Apply all updates of existing packages of your system by executing the following apt commands,

$ sudo apt update -y
$ sudo apt upgrade -y

Once all the updates are installed then reboot your system once.

Step 2) Install Minikube dependencies

Install the following minikube dependencies by running beneath command,

$ sudo apt install -y curl wget apt-transport-https

Step 3) Download Minikube Binary

Use the following wget command to download latest minikube binary,

$ wget https://storage.googleapis.com/minikube/releases/latest/minikube-linux-amd64

Once the binary is downloaded, copy it to the path /usr/local/bin and set the executable permissions on it

$ sudo cp minikube-linux-amd64 /usr/local/bin/minikube
$ sudo chmod +x /usr/local/bin/minikube

Verify the minikube version

$ minikube version
minikube version: v1.21.0
commit: 76d74191d82c47883dc7e1319ef7cebd3e00ee11
$

Note: At the time of writing this tutorial, latest version of minikube is v1.21.0.

Step 4) Install Kubectl utility

Kubectl is a command utility which is used to interact with Kubernetes cluster for managing deployments, service and pods etc. Use below curl command to download latest version of kubectl.

$ curl -LO https://storage.googleapis.com/kubernetes-release/release/`curl -s https://storage.googleapis.com/kubernetes-release/release/stable.txt`/bin/linux/amd64/kubectl

Once kubectl is downloaded then set the executable permissions on kubectl binary and move it to the path /usr/local/bin.

$ chmod +x kubectl
$ sudo mv kubectl /usr/local/bin/

Now verify the kubectl version

$ kubectl version -o yaml

kubectl-version-check-ubuntu

Step 4) Start the minikube

As we are already stated in the beginning that we would be using docker as base for minikue, so start the minikube with the docker driver,

$ minikube start --driver=docker

Output would like below,

minikube-start-docker-driver-ubuntu

Perfect, above confirms that minikube cluster has been configured and started successfully.

Run below minikube command to check status,

pkumar@linuxtechi:~$ minikube status
minikube
type: Control Plane
host: Running
kubelet: Running
apiserver: Running
kubeconfig: Configured
pkumar@linuxtechi:~$

Run following kubectl command to verify the Kubernetes version, node status and cluster info.

$ kubectl cluster-info
$ kubectl get nodes

Output of above commands would like below:

Cluster-info-minikube

Step 5) Managing Addons on minikube

By default, only couple of addons are enabled during minikube installation, to see the addons of minikube, run the below command.

$ minikube addons list

Minikube-default-addons-list

If you wish to enable any addons run the below minikube command,

$ minikube addons enable <addon-name>

Let’s assume we want to enable and access kubernetes dashboard , run

$ minikube dashboard

It will open the Kubernetes dashboard in the web browser.

Minikube-k8s-Dashboard-addon

Kubernetes-Dashboard-Ubuntu

To enable Ingress controller addon, run

$ minikube addons enable ingress

Enable-Ingress-Addon-Minikube

Step 6) Verify Minikube Installation

To verify the minikube installation, let’s try to deploy nginx based deployment.

Run below kubectl command to install nginx based deployment.

$ kubectl create deployment my-nginx --image=nginx

Run following kubectl command to verify deployment status

$ kubectl get deployments.apps my-nginx
$ kubectl get pods

Output of above commands would look like below:

Nginx-based-deployment-k8s

Expose the deployment using following command,

$ kubectl expose deployment my-nginx --name=my-nginx-svc --type=NodePort --port=80
$ kubectl get svc my-nginx-svc

Use below command to get your service url,

$ minikube service my-nginx-svc --url
http://192.168.49.2:31895
$

Now try to access your nginx based deployment using above url,

$ curl http://192.168.49.2:31895

Output,

Curl-nginx-deployment-testing

Great, above confirms that NGINX application is accessible.

Step 7) Managing Minikube Cluster

To stop the minikube, run

$ minikube stop

To delete the minikube, run

$ minikube delete

To Start the minikube, run

$ minikube start

In case you want to start the minikube with higher resource like 8 GB RM and 4 CPU then execute following commands one after the another.

$ minikube config set cpus 4
$ minikube config set memory 8192
$ minikube delete
$ minikube start

That’s all from this tutorial, I hope you have learned how to install Minikube on Ubuntu 20.04 / 21.04 system. Please don’t hesitate to share your feedback and comments.

Recommended Read : How to Install and Use Helm in Kubernetes

The post How to Install Minikube on Ubuntu 20.04 LTS / 21.04 first appeared on LinuxTechi.

How to Install Rocky Linux 8.4 Step by Step with Screenshots

$
0
0

Hello Techies, Rocky Linux 8.4 has been released officially by Rocky Enterprise Software Foundation (RESF). It is considered as the replacement of CentOS Linux. Rock Linux is community-based enterprise level operating system and compatible with RHEL (Red Hat Enterprise Linux). As CentOS 8 updates will not be available the after end of Dec 2021 and if you are looking for production grade operating system then Rocky Linux can be considered.

In this guide, we will cover the installation steps of Rocky Linux 8.4. Before jump into the installation steps, let’s see the minimum system requirements for Rocky Linux.

  • 2 GB RAM or more
  • 20 GB hard disk or more
  • 2 CPU / vCPUs (1.1 GHz processor)
  • Internet Connection (optional)
  • Bootable media (USB / DVD)

Let’s dive into the installation steps of Rocky Linux 8.4

Step 1) Download Rock Linux 8.4 ISO file

Download the ISO file of Rocky Linux from their official web site.

https://rockylinux.org/download

Once the ISO file is downloaded then burn it either into USB or DVD to make the bootable media. In Linux use following to create bootable media:

How to Create Bootable USB Drive on Ubuntu / Linux Mint

Step 2) Boot the system with bootable media

Reboot the target system and go to it’s bios settings and change the boot medium from hard disk to media like USB / DVD.

Once the system boots up with bootable media of Rocky Linux then we will get the following screen.

Welcome-Installation-Rock-Linux-Screen

Choose the first option ‘Install Rocky Linux 8’ and then hit enter.

Step 2) Choose Preferred Language for the installation

Select the language that suits to your installation and then click on ‘continue

Choose-Language-RockLinux-Installation

Step 3) Installation Summary

We will get the following initial default installation summary screen,

Default-Initial-Installation-Summary-RockY-Linux

So, pick each item and do the selection that suits to your environment. To set or change the keyboard layout click on Keyboard icon and choose the preferred keyboard layout and then click on ‘Done

Keyboard-layout-Rocky-Linux-Installation

Set Date and Time Zone

To configure date and time, click on ‘Date & Time’ icon and Choose the time zone

TimeZone-Selection-RockyLinux

Installation Destination

Click on ‘Installation Destination’ icon and choose how you want to configure partitions on the storage. We have two options here,

  • Automatic – In this option, installer will automatically create partitions on the disk.
  • Custom – In this option, you will get luxury to create own custom partitions.

In this guide, we will go with custom option and will demonstrate how to create custom partitions on 64 GB disk.

Choose-Custom-Storage-Configuration-Rocky-Linux

Click on ‘Done’ and then we will get the following screen.

Let’s create our first partition as /boot of size 2 GB with ext4 file system.

Select ‘Standard Partition’ and the click on + symbol and in pop up window specify mount point as /boot and desired capacity as 2 G.

boot-partition-rocky-linux-installation

Click on ‘Add mount point’ and then change the file system to ext4 from xfs and then click on ‘Update Settings

Update-boot-Filesystem-RockyLinux

Create the next partition as /home of size 30 GB and file system as ext4

Click on + symbol and then specify the mount point as /home and desired capacity as 30 G

Home-Partition-Rocky-Linux-Installation

Click on ‘Add mount point

Similarly create /root and /var partitions of size 20 GB and 10 GB respectively.

Slash-Root-partition-rock-linux-installation

Var-partition-rocky-linux-installation

Now create the last partition as swap of size 2 GB

Swap-Partition-Rocky-Linux-Installation

Click on ‘Add mount point’ and then click on ‘Done’ to proceed further

Choose-Done-Manual-Partition-RockyLinux

In the next screen, choose ‘Accept Changes’ to write the changes to the disk

Accept-Changes-Write-Disk-Rocky-Linux

Now we are back on the installation summary screen, if you wish to configure network then click on ‘Network and Hostname’ icon.

Network-hostname-Rocky-Linux

Click on ‘Done’ to go back to installation summary screen

In case you want to choose the preferred Base Environment then click on ‘Software Selection’. In my case I am selecting ‘Server with GUI

Base-Env-Software-Selection-Rocky-Linux

Click on Done.

Now set the root user password by choosing ‘Root Password’ icon

Root-Password-RockyLinux-Installation

Mentioned the root password twice that you want to set and then click on Done.

Create Local user account by selecting ‘User Creation’ icon

Local-User-Creation-RockyLinux-Installation

Click on Done to go back to previous screen,

Step 4) Begin Rocky Linux Installation

Now at this step, we are ready to start Rocky Linux installation, click on ‘Begin Installation’ icon

Begin-Installation-Rocky-Linux

As we can see below, Installation has been started and is in progress.

Rocky-Linux-Installation-Progress

Once the Installation is completed successfully then installer will prompt to reboot the system once.

Reboot-System-After-Rocky-Linux-Installation

Click on ‘Reboot System

Step 5) Login Screen After Installation

After reboot, don’t forget to change boot medium from USB / DVD to hard disk from the bios settings so that system boots up with newly installed Rocky Linux.

When the system boots up accept Rocky Linux license.

License-Agreement-Rocky-Linux

Click on Done to proceed further.

Now click on ‘Finish Configuration

Finish-Configuration-Rocky-Linux

We will get the following login screen, use the same user credentials that we have created during the installation.

Login-Screen-Rocky-Linux

After entering the credentials we will get the following desktop screen

Rock-Linux-GUI-Dashboard

Rocky-Linux-Desktop-GUI

Perfect, Above confirms that Installation has been completed successfully. That’s all from guide, I hope you have found this guide informative. In case you have any doubts and queries, please write it in the comments section below.

The post How to Install Rocky Linux 8.4 Step by Step with Screenshots first appeared on LinuxTechi.

How to Install Ansible on Ubuntu 20.04 LTS / 21.04

$
0
0

Ansible is a free and opensource IT Automation and configuration tool. It is available for almost all the Linux distributions and can be used to manage Linux and Windows systems. Now a days Ansible is also used to manage EC2 instances in AWS, Virtual machines, and Containers etc. It does not require any agent on managed hosts, but it only requires ssh connection.

In this article, we will cover how to install latest version of Ansible on Ubuntu 20.04 LTS / 21.04

System requirements for Ansible

  • Minimal Installed Ubuntu 20.04 LTS / 21.04
  • sudo user with root privileges
  • 2 CPU / vCPU
  • 2 GB RAM or more
  • 20 GB Hard drive
  • Internet Connection (In case you don’t have local configured apt repository server)

Following is my lab setup details for ansible demonstration.

  • Ansible Control Node – control.example.com (192.168.1.112)
  • Ansible Managed Nodes – node1.example.com & node2.example.com
  • sysops sudo user on control and managed nodes with privileges.

Note: Here node1 is a Ubuntu System and node2 is a CentOS system and control node is the system where we will install ansible. I am assuming sysops is already created on each host.

To configure sudo user (sysops) to run all the commands without prompting for the password then run the following command on each managed host

echo "sysops ALL=(ALL) NOPASSWD:ALL" > /etc/sudoers.d/sysops

Let’s jump into the Installation steps of Ansible

Step 1) Apply Updates on Control Node

Login to Ubuntu 20.04 LTS / 21.04 system and run below apt commands to apply updates.

$ sudo apt update
$ sudo apt updgrade -y

Once all the updates are installed then reboot the system once.

$ sudo reboot

Step 2) Install dependencies and configure Ansible Repository

Install ansible dependencies by running the following apt command,

$ sudo apt install -y software-properties-common

Once the dependencies are installed then configure PPA repository for ansible, run

$ sudo add-apt-repository --yes --update ppa:ansible/ansible

Now update repository by running beneath apt command.

$ sudo apt update

Step 3) Install latest version of ansible

Now we are ready to install latest version of Ansible on Ubuntu 20.04 LTS / 21.04, run following command.

$ sudo apt install -y ansible

After the successful installation of Ansible, verify its version by executing the command

$ ansible --version

Ansible-Version-Check-Ubuntu

Great, above output confirms that Ansible version 2.9.6 is installed.

Step 4) Setup SSH keys and share it among managed nodes

Now let’s generate the SSH keys for sysops user from the control node and share it among managed hosts. Run  ssh-keygen command

$ ssh-keygen

Hit enter when prompting for the input, output is shown below

ssh-keygen-output-ubuntu-linux

Note : Add managed host entries in /etc/hosts file on control node. This is only required when you don’t have local DNS server configured.

192.168.1.115   node1.example.com
192.168.1.120   node2.example.com

To share the ssh keys between control to managed hosts, run ssh-copy-id command example is shown below

$ ssh-copy-id node1.example.com
$ ssh-copy-id node2.example.com

Output of above commands would look like below

Copy-sshkeys-ansible-managed-host

Step 5) Create ansible cfg and inventory file

It is always recommended to have separate ansible.cfg and inventory file for each project. For the demonstration purpose I am using demo as the project name. So, create the project folder first by running mkdir command.

$ mkdir demo

Copy the default ansble.cfg file to ~/demo folder,

$ cp /etc/ansible/ansible.cfg ~/demo/

Edit the ~/demo/ansible.cfg file, set the following parameters,

$ vi ~/demo/ansible.cfg

Under the default sections

inventory      = /home/sysops/demo/inventory
remote_user = sysops
host_key_checking = False

Under the privilege_escalation section

become=True
become_method=sudo
become_user=root
become_ask_pass=False

Save and Close the file. Now, let’s create the inventory file that we have defined in ~/demo/ansible.cfg file.

$ vi ~/demo/inventory
[dev]
node1.example.com

[prod]
node2.example.com

save and quit the file

Now finally instruct ansible to use demo project’s ansible.cfg file by declaring ANSIBLE_CONFIG variable, run the following commands,

$ export ANSIBLE_CONFIG=/home/sysops/demo/ansible.cfg
$ echo "export ANSIBLE_CONFIG=/home/sysops/demo/ansible.cfg" >> ~/.profile

Run ansible –version command from demo folder to verify ansible configuration

$ cd demo/
$ ansible --version

Project-Ansible-cfg-file-Ubuntu

Great, Ansible is now reading our project’s ansible configuration file. Let’s verify the managed nodes connectivity using ansible ad-hoc command,

$ ansible all -m ping

Note : Make sure run ansible command from demo folder.

Output of command would look like below:

Ansible-Ping-Pong-Connectivity-Ubuntu

This output confirms that connectivity is in place from control node to managed hosts.

Step 6) Create Ansible playbook to Install packages on managed hosts

To verify the ansible installation and configuration, let’s create a sample playbook named as packages.yaml under demo folder.

$ vi packages.yaml
---
- name: Playbook to Install Packages
  hosts:
    - dev
    - prod
  tasks:
  - name: Install php and mariadb
    package:
      name:
        - php
        - mariadb-server
      state: present

save and Close the file

Now run the playbook using ansible-playbook command,

$ ansible-playbook packages.yaml

Output:

Ansible-Playbook-Execution-Ubuntu

Above output confirms that playbook has been executed successfully. To verify result, run following ad-hoc commands,

$ ansible dev -m shell -a 'dpkg -l | grep -E "php|mariadb"'
$ ansible prod -m shell -a 'rpm -qa | grep -E "php|mariadb"'

That’s conclude the article. In case you have found this article informative then please do not hesitate to share it. In case, you have any query please drop it in comments sections below.

Read Also : How to Use Handlers in Ansible Playbook

The post How to Install Ansible on Ubuntu 20.04 LTS / 21.04 first appeared on LinuxTechi.

Easy Guide to Migrate from CentOS 8 to Rocky Linux 8

$
0
0

As we all know that CentOS 8 updates and support will not be available after the end of Dec 2021. There are huge number CentOS 8 servers which are used in development and production environment in different organizations. In case you are looking for CentOS 8 alternative then Rocky Linux is the best candidate. Rocky Enterprise Software Foundation (RESF) provides a migration script that will smoothly migrate existing CentOS 8 system into Rocky Linux 8.

In this guide, we will cover how to migrate from CentOS 8 to Rocky Linux 8 step by step. For the demonstration purpose, I have one CentOS 8 system installed with Server GUI option. Apart from this, Docker engine is running on this system.

Note: Before Upgrade, please make sure you take the backup of applications and if possible, take the snapshot of complete CentOS 8 system. There could be scenarios that after upgrade application stop working.  So, in such scenarios your application can be restored from backup.

Below is the snapshot of my CentOS 8 system before migration.

Before-Migration-CentOS-Linux

Let’s dive into migration steps.

Step 1) Upgrade CentOS 8 system to latest version

Login to CentOS 8 system, install all the updates of existing packages and upgrade it to latest CentOS 8 version.

$ sudo dnf update -y
$ sudo dnf upgrade -y

Once the system is upgraded to the latest version, reboot it once

$ sudo reboot

Step 2) Download the migration script

For smooth migration, rocky linux developers have created a migrated script called ‘migrate2rocky.sh’. Use below wget command to download it.

$  wget https://raw.githubusercontent.com/rocky-linux/rocky-tools/main/migrate2rocky/migrate2rocky.sh

Set the executable permissions on the script using chmod command,

$ chmod +x migrate2rocky.sh

Step 3) Start migration by running the script

Now we are ready to start the migration from CentOS 8 to Rocky Linux 8, Run the migration script.

$ sudo ./migrate2rocky.sh -r
Or
$ sudo  bash migrate2rocky.sh -r

In above script ‘-r’ options specify that we want to convert the system into Rocky Linux.

Migrate2rocky-script-centos

First task of this script is to change CentOS 8 package repositories to Rocky Linux 8.

Change-CentOS8-Repo-to-Rocky-Linux8

Further, this script will identify which packages needs to be download for Rocky Linux 8.4 and then will install, reinstall or update based on the requirement.

Once all the packages are installed / updated then script will prompt to reboot the system. Whole migration process can take hours or minutes depending upon the system configuration, resources, and internet speed.

Reboot-After-Migration-Rocky-Linux

Perfect, above output confirms that migration script has been executed successfully. If you want to have a look on logs of migration script then refer ‘/var/log/migrate2rocky.log’ file.

Now reboot the system using below command,

$ sudo reboot

Step 4) Verify the migration

When the system is rebooted  after the migration then we can see the change at Grub screen, a new Rocky Linux kernel is added there, so choose Rocky Linux and hit enter

Rocky-Linux-Grub-Entry

It will boot up and will get the following Rocky Linux login screen,

Rocky-Login-Screen-after-migration

Enter credentials and then click on ‘Sign In

Rocky-Linux-After-Migration

Great, above screenshot clearly confirms that the system is now running on Rocky Linux 8.4. That’s all from this guide. I hope you have found this step by step migration guide informative. Please do share your feedback and queries in the comments section below.

The post Easy Guide to Migrate from CentOS 8 to Rocky Linux 8 first appeared on LinuxTechi.

How to Install Ansible AWX on Kubernetes Minikube

$
0
0

Hello Geeks, I hope you are aware about Ansible AWX, if not then Ansible AWX is a Web based GUI tool for managing ansible playbooks. There are lot of other features of AWX apart from execution of Ansible playbooks like source management integration, logging RBAC and more.

In other words, we can say Ansible AWX is considered as an upstream project of Red HAT Ansible Tower. From AWX version 18.x and onwards, installation focus is moved from docker to Kubernetes. So, in this article, we will cover the step by step Ansible AWX Installation on Kubernetes Minikube.

I am assuming Minikube is already installed on your Linux system. If not, then use below URL:

Note: Make sure you start your minikube cluster with enough resources (at least 4 vCPU and 8 GB RAM) , in my case I have started minikube with following resources and options.

$ minikube start --addons=ingress --cpus=4 --cni=flannel --install-addons=true --kubernetes-version=stable --memory=8g

Verify the Minikube Cluster Installation

Run following commands to verify the minikube installation and cluster status,

$ minikube status
$ kubectl cluster-info
$ kubectl get nodes

Output of above commands should look like below:

Minikube-Installation-Cluster-Check

Perfect, above confirms that minikube has been installed and started successfully. Let’s move to AWX installation steps.

Step 1) Install AWX Operator

To install AWX operator, execute the following kubectl command,

$ kubectl apply -f https://raw.githubusercontent.com/ansible/awx-operator/0.12.0/deploy/awx-operator.yaml

Output

Install-AWX-Operator-kubectl-command

Run below command to confirm whether AWX operator’s pod is started or not. If not started then wait for couple of minutes as it takes time,

devops@linuxtechi:~$ kubectl get pods
NAME                           READY   STATUS    RESTARTS   AGE
awx-operator-79bc95f78-pb7tz   1/1     Running   0          5m23s
devops@linuxtechi:~$

Step 2) Create AWX Instance yaml file

Create ansible-awx.yml file with the following contents

$ vi ansible-awx.yml
---
apiVersion: awx.ansible.com/v1beta1
kind: AWX
metadata:
  name: ansible-awx
spec:
  service_type: nodeport
  ingress_type: none
  hostname: ansible-awx.example.com

save and quit the file.

Step 3) Deploy Ansible AWX Instance

Now, let’s deploy AWX instance in our cluster by executing below command,

devops@linuxtechi:~$ kubectl apply -f ansible-awx.yml
awx.awx.ansible.com/ansible-awx created
devops@linuxtechi:~$

Above will create a deployment with a name ’ansible-awx’ and this deployment will have two pods and services.

After couple of minutes, Ansible AWX will be deployed and in case you wish to monitor installation logs then use below command,

$ kubectl logs -f deployment/awx-operator

Run below command to verify the status of AWX Pods,

devops@linuxtechi:~$ kubectl get pods -l "app.kubernetes.io/managed-by=awx-operator"
NAME                           READY   STATUS    RESTARTS   AGE
ansible-awx-5ddfccf664-vrdq2   4/4     Running   0          7m40s
ansible-awx-postgres-0         1/1     Running   0          8m24s
devops@linuxtechi:~$

Run following command to view the service status,

devops@linuxtechi:~$ kubectl get svc -l "app.kubernetes.io/managed-by=awx-operator"
NAME                   TYPE        CLUSTER-IP     EXTERNAL-IP   PORT(S)        AGE
ansible-awx-postgres   ClusterIP   None           <none>        5432/TCP       8m31s
ansible-awx-service    NodePort    10.97.206.89   <none>        80:32483/TCP   7m55s
devops@linuxtechi:~$

Please make a note of node port of ‘ansible-awx-service’, we will be using it later for port forwarding.

Step 4) Access AWX Portal via tunneling

To access AWX portal outside of minikube cluster, we must configure the tunneling, run

devops@linuxtechi:~$ nohup minikube tunnel &
[3] 35709
devops@linuxtechi:~$
devops@linuxtechi:~$ kubectl get svc ansible-awx-service
NAME                  TYPE       CLUSTER-IP     EXTERNAL-IP   PORT(S)        AGE
ansible-awx-service   NodePort   10.97.206.89   <none>        80:32483/TCP   90m
devops@linuxtechi:~$

Set the port forwarding in such a way that, if the request is coming on minikube IP on node port ‘32483’ then it should be redirected to port 80 of awx pod.

devops@linuxtechi:~$ kubectl port-forward svc/ansible-awx-service --address 0.0.0.0 32483:80 &> /dev/null &
[4] 46686
devops@linuxtechi:~$

Now try to access AWX portal from the web browser by using minikube ip address and node port 32483

http://<minikube-ip>:<node-port>

Access-Ansible-AWX-Portal-Minikube

To get the credentials, go back to terminal and run beneath command.

devops@linuxtechi:~$ kubectl get secret ansible-awx-admin-password -o jsonpath="{.data.password}" | base64 --decode
PWrwGWBFCmpd1b47DJffCtK5SqYGzxXF
devops@linuxtechi:~$

Use the username as ‘admin’ and the password as the output of above command, after entering the credentials we will get following dashboard

AWX-Dashboard-minikube

Great, above confirms that Ansible AWX is installed successfully on Kubernetes minikube. That’s all from this article. I hope you have found it informative and in case you have any queries, feel free to write us in below comments section.

Read Also : How to Run and Schedule Ansible Playbook Using AWX GUI

The post How to Install Ansible AWX on Kubernetes Minikube first appeared on LinuxTechi.

How to Extend XFS Root Partition without LVM in Linux

$
0
0

There are some situations where / or root partition is running out of disk space in Linux. Even compressing and deleting old log files did not help, so in such cases we are left with no option but to extend / filesystem. In this article, we will demonstrate how to extend xfs based root partition without lvm in a Linux system.

If we talk about the logical steps, first we have to add additional space to OS disk and then use growpart and xfs_growfs commands to extend the root partition (or filesystem).

I am assuming we have a Linux based Virtual Machine running either on KVM hypervisor or VMware or VirtualBox. In this machine, we have 10 GB XFS based / root partition and want to extend it till 20 GB.

Let’s dive into the actual steps,

Step 1) Verify the root partition size

Login to the Linux machine and run below df command to view current size of root partition,

$ df -Th /
Filesystem     Type  Size  Used Avail Use% Mounted on
/dev/sda2      xfs    10G  9.1G  991M  91% /
$

Verify the size of OS disk using lsblk and fdisk commands

$ lsblk /dev/sda
$ sudo fdisk -l /dev/sda

View-OS-Disk-Size-Linux

Above output shows that size of OS disk is 12 GB. We have two partitions as /boot & /.

Step 2) Increase the size of OS disk  

Increase the size of OS disk, in my case I will change OS disk size from 12 GB to 22 GB as I want to extend / partition by 10 GB.

Depending on the environment, one must perform this action. In my case I have a VM running inside a VirtualBox, so first stop it and extend the disk size as shown,

OS-Disk-Size-VirtualBox

Change the size and set it as 22 GB

Change-OS-Disk-VirtualBox

Click on apply and then start the virtual machine.

Step 3) Extend root partition based on xfs filesystem

To extend root partition we need growpart and xfs_growfs commands or utilities. But these are not available in the default installation, so let’s first install these using the following command,

$ sudo apt install cloud-guest-utils gdisk -y         // For Ubuntu & Debian
$ sudo dnf install cloud-utils-growpart gdisk -y     // For RHEL 8 / CentOS 8
$ sudo yum install cloud-utils-growpart gdisk -y    // For RHEL 7 / CentOS 7

Once above packages are installed, view OS disk size with lsblk and fdisk commands,

Updated-OS-Disk-size-linux

Above output confirms that OS disk size is now 22 GB, now let’s extend root partition using following commands,

Run growpart command on 2nd partition of /dev/sda disk (we have used 2 as partition number because our root partition is 2nd on the disk).

$ sudo growpart /dev/sda 2

Note: growpart command will rewrite the partition table so that partition takes all the space.

Verify the lsblk output for / partition,

$ lsblk

lsblk-command-output-after-growpart

Now run xfs_growfs command to extend the root filesystem,

$ sudo xfs_growfs /

Extend-XFS-Root-Partition-Linux

Verify the size of / file system using df -Th command,

[sysops@linuxtechi ~]$ df -Th /
Filesystem     Type  Size  Used Avail Use% Mounted on
/dev/sda2      xfs    20G  9.2G   11G  46% /
[sysops@linuxtechi ~]$

Perfect above output shows that / partition has been extended to 20 GB. That’s all from this article. I hope you have found it informative. Please do share your feedback and comments in the below comments section.

The post How to Extend XFS Root Partition without LVM in Linux first appeared on LinuxTechi.
Viewing all 452 articles
Browse latest View live